Quantcast
Channel: The WoffBoot Chronicles
Viewing all 1337 articles
Browse latest View live

I Can Quit Any Time I Want

$
0
0

It's not been a busy month, this. That's why I've got so much painting done.


Eighty models? Have I really painted eighty things this month?


  • 30 Eldar
  • 3 AG platforms
  • 6 Swooping Hawks
  • 20 Corsairs
  • 6 Fire Dragons
  • Valendor
  • Ba'el
  • 5 Assorted Reaper
  • 2 Realmgates 
  • 1 Maggoth
  • 3 Maggoth Riders
  • 2 Nurgle Champions (yet to be revealed) 


Plus all those battle reports. Man, I need to get out more. I'm back out on tour next month, that'll help.


Well, five more chips off the Reaper block. Still plenty more in there, although most of it is already a bit painted as my daughters are 'helping' daddy with his very important work. Probably ought to get on and do the good ones before they become spherical balls of acrylic paint, really.

Random Futuristic Henchman. Not an inspiring piece, although I may go back and sort his eyes out.

These five are broadly themed as more steampunk guys, plus a random hero.

Odd model, this. He's standing on a drain cover with a torch, which sort of makes him feel like a 1920s Mythos investigator. But what's that stick? Why the silk scarf and T-shirt? Weird.
Thumbs up for science! Wait, the mechanism's jammed again.

Early Victorian Power Armour

After that, I felt I needed to get something off my plate. Time for a Return to the Return to Valendor.


Ba'el is still, for my money, a crap model. Stylus managed to make him look good, though, and I felt inspired to have another crack at him. The brown paint scheme looks much better and was also much easier to do, and slapping BftBG on in the cracks as an afterthought, instead of trying to paint them gory reds before, was way more effective. I'm pleased to get him out of the way and feel I've done him some justice.


He's still badly posed and oddly proportioned. Those wings! the ragged flesh is too thick, he doesn't have the chest muscles or stature to carry them off if you imagine how big they're supposed to be, and he's got two big toes on each foot, although I guess Demons are allowed that kind of extravagence. 


And he just doesn't scream 'Big Bad Villain' to me. Henchman Muscle at best, end of session encounter rather than end of season. Ah well. For his antagonist in the campaign, Mr Titular himself, Valendor, I decided to take a thrown-away remark by Stylus at face value.


Valendor had his head, spear and hands chopped off, then his base replaced by a Reaper 40mm round. Then I cracked out the Chaos Warrior spare parts. He got a Marauder Horseman axe, a standard Warrior's shield and a Chaos Knight head, then a green stuff fur mantle (in strict defiance of PETA guidelines) made of the leftovers from sticking the new bits on.

I'm pleased with the cloak design, which I cheated a bit to do. Brown basecoat, then before it dried, I stuck a plastic Khorne Icon on the back, then sprayed again with black. Easy to remove, and gave me a nice stencil to fill in for the logo.

One shiny red paintjob later, he looks quite presentable. He's not quite finished, he'll eventually be ankle deep in gore to cover his tiny elfin feet, but I think he's a massive improvement on the original.

This is him with a finished paintjob but an incomplete base. After pouring in the water effect resin, I was delighted to find that his base leaked. Once I'd prized him free of the paint rag I'd now stuck him to, I plugged the gaps with blutack and tried again.
Here it is once it had dried - I swirled dollops of BftBG through the resin before it set, and in places it looks nicely layered. Bit heavy in other places, sadly. 
So here's the finished article! He's quite... red?

Impressed as I was by the Exalted Deathbringer in our recent AoS battle, I think that's Valendor's true calling now. See? Nothing a Mark of Chaos can't fix.


I Don't Have a Problem

$
0
0


1. I have felt the need to Cut down on my painting
2. People have Annoyed me by criticizing my painting
3. I have felt Guilty about painting
4. I have to paint at least one Eye-opening squad before breakfast to steady my nerves

But I'd still deny there's anything wrong with me.


As my model count breaks ninety this month, I'm officially eating my Painters Anonymous chips. To round off the month as I started, some Spocks - Scorpions and Reapers.


Reapers are heavy weapon experts. In the fluff, they have big triangular earpieces on their helmets containing special tracking systems. Leofa's conversions do away with these ridiculous flaps, and it's all to the good.


I've kept to a fairly traditional look here, black and bone, in keeping with their grim reaper vibe. The helmets take a skull motif pretty well, and red gems give it the flair. The guns are so studded I was tempted to skip the addition of a shoulder gem, but then I thought they'd feel all left out, and chose purple for a second spot of colour. As always, the costume jewelry is a lot better than my lighting effects.


Painting Guide: -


  • Undercoat - Black
  • Armour - Eshin Grey drybrush, then very watery Ulthuan Grey highlights done carefully and slowly
  • Bone - XV88 with Ushabti Bone layering, then a highlight of Pallid Wych Flesh
  • Silver - Leadbelcher with Stormhost Silver layer
  • Gems - Khorne Red, Wild Rider Red, White Scar dot


Striking Scorpions have my favourite Grimdark wargear name of all time, their Mandiblasters. Again eschewing the fluff, Leofa's have mini plasma cannons on their shoulders, a la Predator.


The paint scheme isn't far from that particular xeno either, although it's actually based on a terrestrial scorpion. They usually roll in green and yellow, so their weapons and gems provide those spot colours so they aren't too drab. Gloss varnish to finish, because I'm out of shellac.


Painting Guide: -

  • Undercoat - Black
  • Armour - Layers of Rhinox Hide, Scrag Brown and Deathclaw Brown, then 'Ardcoat finish
  • Weapons - Orchide Flesh, Forest Green layer and Niblet Green drybrush
  • Plasmacaster - Temple Guard Blue, White Scar
  • Gems - Yellow gems are really hard to paint, I never feel happy with the results. This attempt is Abaddon Black, Zamesi Desert and Bad Moons Yellow (White Scar dot) and is a mild improvement on my last batch


Unusually for me, neither of these squads has had any washes. Hard to go down from Black, I think, although I know Saint Duncan backs it. They took four evenings total, which felt very fast. Either I'm really in the zone at the moment or washing is more time consuming that I thought.

Three squads and heroes to go, then the Spocks are done!

Don't Look At Me

$
0
0


Oh alright, Stylus, yes I'll paint a hundred models this month. Stop nagging.

One hundred and four in total, in fact, which is something ludicrous like three and a bit models a day. Like I said, it's been a quiet month.

Warp Spiders first, and so it was back to the internet to look at nature pictures. Spiders and Scorpions, being fairly close relatives, tend to have similar colours - lots of browns and blacks. So I needed something distinct but still naturalistic.

Image result for orange legged spider
Ladies and Gentlemen, all the way from Australia, the Orange Legged Spider!

Browns and blacks, still, but with a citrus twist. I'm not entirely convinced I nailed it, sadly, so I tried to make up for it with freehand web designs on the helmets and some nice red guns.


No gloss for these guys either, again to help distinguish them from the Scorpions. Also because spiders are hairier and less glossy in most of the pictures I found. Scorpions are clearly the supermodels of the arachnid world in this respect.


Very dynamic, these models. Torsos and legs from Dark Eldar Wyches, if I don't miss my guess? And not even jumping off handily posed stonework, which is nice. Much slimmer than some of the other bodies in this army, though, and no nice large armour panels to stick gems on them, so sorry guys, no bling for you.


Painting Guide:


  • Basecoat - Mournfang Brown
  • Armour - Nuln Oil wash, then Deathfang Brown and Tau Light Ochre drybrush, then Agrax Earthshade wash, then selected bits done in Troll Slayer Orange. My pot of this is elderly and decaying, and I'm going to blame it for the rather blotchy outcome instead of myself, because it can't stop me
  • Guns - Khorne Red, Druchii Violet wash, Wazdakka Red layer, Astorath Red drybrush. Gems done with Abaddon Black, Tau Light Ochre and Bad Moon Yellow, White Scar dots where I could manage them, those gems are damn small. Bad Moon Yellow and White Scar in the firing chamber
  • Warp Nodes - Warplock Bronze with Gehenna Gold highlights
  • Eyes and Belts - Xereus Purple, Druchii Violet wash, Genestealer Purple highlights
  • Gear - Skrag Brown, Altdorf Guard Blue grenades
  • Webbing - Pallid Wych Flesh


Banshees next. In nature, Banshees are ethereal-coloured, according to the pictures I could find.

Image result for banshee


And we all know what that means, right?


Yup, Spooky Ghost Wash Nihilakh Oxide galore! I even copied the orange hair, although that's traditional Howling Banshee, to be fair.


Black masks and guns, mostly for contrast. Between the very pale armour and the glowing weapons, they needed something dark and heavy-looking so they wouldn't float off. They have the same Wych bodies as the Spiders, so again, no gems. I did try (dark green ones) but they looked too big and very out of place.


Painting Guide:


  • Basecoat - White
  • Armour - Nihilakh Oxide wash, Hellion Green and Praxeti White drybrushes, Pallid Wych Flesh highlights as the Praxeti wasn't quite sharp enough
  • Zips, Buckles, Bondage Gear, etc - Balthazar Gold
  • Masks and Guns - Abaddon Black, Eshin Grey drybrush, watery Ulthuan Grey highlight, 'Ardcoat
  • Hair - Jokaero Orange, Agrax Earthshade, Ryza Rust and Tau Light Ochre highlights
  • Utility Belts - Skrag Brown, Averland Sunset Grenades
  • Gems, Eyes, Etc - Wazdakka Red, Troll Slayer Orange highlight
  • Skin - Warpfiend Grey, Rakarth Flesh layer, Rakarth + Ulthuan Grey highlight
  • Blades - Temple Guard Blue, Skink Blue stippling, Ulthuan Grey and White Scar detail


And that's the Aspects all done. Time for a break - my wrist is aching. Luckily, the Bretonnian expansion is releasing for Total Warhammer tonight, so that might stop me auto-painting in my sleep for a bit. If you can't break one cycle of addiction, ram it with a different one, that's what I always say.

Slambo - A Social and Military History

$
0
0


Slambo!

As previously mentioned, the 80s classic chaos warrior model has a special place in my heart. It's a great model, right back to the Adrian Smith artwork which I first saw in Advanced Heroquest's manual, many long years ago.

Image result for adrian smith chaos warrior

This is a quick look back at the iconic model, his rules and models and place in the game.

The Early Years


The original model was lurking about on GW's website as part of a four-pack of Classic Chaos Champions for a while, which is when I finally picked it up. That's about twenty years after the event. Slow I may be, but I get there.

Back in the day, individual lead models got names, mostly to help you order them from the Mail Order Trolls. This before there were Mail Order Trolls, in fact, just some people in an office somewhere wishing their job description was cooler. Original Slambo is jsut as small as many of those models are, but he looks bigger because he's cooler. In my head, anyway.

Because he's quite small compared to modern chaos warriors, I picked out a little extra detail on mine by doing runes on the axes and head. I've almost never used the model. He usually acts as filler in Chaos Warrior units when he does get out, and he's not given to ranking well. He is revered amongst my collection nevertheless, and will certainly get a day out if I ever play Advanced Heroquest again.

Up a Level


The first time I bought the model, however, was in the 90s. Chaos had a new army book for 3rd Ed, I think it was, and terms like Exalted Champion or Hero were becoming standardised as codes for particular levels of hero.


The twin-axe chaos hero of the day was basically an updated Slambo. Check the design on his right shoulder plate if you really doubt this - it's the same rune. As if the axes didn't give it away, right? I actually snipped the skull holding his horns together off, I felt it was one too many on what is already quite a detailed model. Bone necklace, sidearm, belts and pouches, plus a cloak.

Actually, he's a bit better than the original - more dynamic pose, chunkier, fits in a unit more easily. Heresy, I know! But if you're not going to utter heresy when you're talking Chaos Warriors, when are you going to do it?

Middle-aged Slambo was often used in my 8th Ed WFB armies, usually as the Lord. Given that I almost always lost those battles, I don't think he's ever managed to pull off any memorable stunts other than catching all the Wood Elf Arrows ever fired. But all the same, epic and legendary.


Age of Slam

And now, of course, Slambo's back!

Image result for Slambo

Slambo became a meme during the End Times, when miserable grognards used his name to replace any character they didn't like in the fluff. Archaon too lame for you? Slambo, Lord of the End Times. Not enjoying the death of your beloved old world? Let Slambo, first true demon prince and Lord of Chaos Undivided take your mind off it. He's even been a commentator in Bloodbowl's Age of Slam, whatever that was.

Age of Sigmar gives him, for the first time, his own rules as a named character. He's a hero and monster hunter with ranged axe throws, and he gets to go twice in the combat phase. But for all that, I think he's going to be a disappointing liability because his melee attacks are a random d6. Yes, it could end up being loads, especially if he manages to kill an enemy hero and double everything. Even if he does the most he possibly could (24 attacks!), my mathhammer reckons he's not going to get more than about six wounds out of it (4+ to hit, 3+ to wound, maybe a save or two from the foe). Compare that to a Doombull and weep.

The model's still good, of course, despite being resin and suddenly massive, and despite using the extra space on the base to adopt a Blackadder Actor's power stance.

Image result for blackadder actors roar
ROOOOOOOAAAAAAAAAARRRRR


So obviously, despite previously saying I wouldn't, I went out and bought it.

A Swift Conclusion


And then painted it in under two hours, because I'm ridiculous.
Black undercoat, Eshin Grey drybrush and Ulthuan Grey edging.
Time - 10 mins
Leadbelcher for axes and chainmail, XV88 for skulls and ivory, Rhinox for boots and straps. Dryad Bark on the base.
Time - 5 minutes

Nuln Oil over all the black armour, Agrax on the browns.
Time - 5 mins, then 10 more to dry
Balthasar Gold details on the armour plate.
Time - 20 mins
Image result for engraved plate armour
This is the kind of blinged up nonsense I'm looking to evoke. Why don't the military still do this with body armour? Much more fun than camo.
Karak Stone and Ushabti Bone on the horns and skullpile. Rhinox Hide layer on the boots. Ironbreaker and Runefang details on the axes and chainmail.
Time - 15 mins
Dawnstone on the base stones. Ushabti Bone blended up to Pallid Wych Flesh on the skulls and horns.
Time - 10 mins
Longbeard Grey drybrush on the base stones. Auric Armour Gold and Stormhost Silver detailing on the armour patterns. Rhinox Hide blended with Scraag Brown, then Ushabti Bone for the boots and axe straps. A lick of Sylvaneth Bark on the axe handles, a light drybrush of Terminatus Stone on the boots. Snow and grass on the base.
Time - 10 mins
Outside for a quick spray of Purity Seal, then inside again for 'Arcoat on the black armour.
Time - 5 mins, for a total of 1 hour, 30 mins

Big, brutal, dark and threatening - everything he's always been, just slightly bigger. And easier to put all the armour detail on as a result, which is actually what sold me on getting him. I've always wanted to attempt that sort of gothic plate, but never had the confidence I could manage it on such a small scale. 

Here's that scale creep. He's actually not that much bigger than the last one, although the cloak makes that one look bigger

He'll probably make an appearance in our AoS games at some point, so we'll see how he handles then. Until then, I've some more extra fine armour details to be sorting out. You might have noticed in the last few months I've been adding more stuff like dags or checks to my models. That's because it's time to do the Harlequins, and I've needed all the practice I could get for those damn diamonds. Will it pan out? Tune in later this month* to see...

Can't have too many Slambos in one post, I reckon, so here he is again.
*i.e. probably in about twenty minutes

Warlord of Galahir: While You Were Sleeping

$
0
0
We're back into the Dungeon Saga of Galahir! Tonight's brave quest involves ... the murder of the unconscious.

Wait, what? Are we going to happily kill the minions in their sleep?

Red Dwarf IV: Justice
"I could happily kill him if he was on the job."

What the hell kind of heroes are these anyway? I blame Joe Abercrombie.

Seriously, our mission tonight is to sneak into the dungeon and kill three sleeping orcs. And if that works up an appetite, perhaps we can steal some candy from a baby on the way home.

It's probably harder than it sounds. I hope it's harder than it sounds, otherwise Mission 3 just took a dark turn.

Meh - they're just orks. Damn liberals  - you're probably going to want to take them home and offer them education. Kraken here, looking for approval for my new Orcbane-a Care Proposals.

Mission 3: Rise And Shine!

A report from Dungeon Saga, Warlord of Galahir - Mission 3: Rise And Shine!

No door tonight (shame ... and I almost had them painted), just a single level laid out before us. The three toppled orcs are asleep, dreaming their happy dreams. Most of the Goblins are in a single room, betting heavily on the Mawbeast fight and too distracted to spot us. That only leaves two sentries with their backs to us.

The sneaky part of this mission is that no Goblin or Mawbeast can do anything until they see us, or get shouted at by an Orc. The Orcs will only wake up if attacked, or have a chance of waking up if they hear a commotion (i.e. a Goblin making a defence roll).

There are some new rules covering all this stealth, and they're functional if a little erratic. Most of it revolves around a nice random dice roll when you start stabbing. All the same, I'm feeling apprehensive. My defence force is a lone stand of Orclings until the heroes screw up and alert the troops.

With murderous intent, the Dwarf and Salamander creep up behind the Goblin  sentries and swiftly dispatch them. Easily done, but that's enough to wake two of the Orcs, so there goes our surprise.

(Given that there's no way to get to the Orcs other than killing those sentries, it's a shame there wasn't a stealthy way to take them out - the Elf's bow, Mawbeast Treats, or a magic tranquilliser dart gun).

A report from Dungeon Saga, Warlord of Galahir - Mission 3: Rise And Shine!

The other two heroes join the fray. The Gladewalker casts Root on the Orclings, so even if the Goblins see us, they're stuck in the gambling den (given that the Orclings are designed to be underfoot, you'd think there would be a mechanic to trample over them).

A report from Dungeon Saga, Warlord of Galahir - Mission 3: Rise And Shine!

The Elf shoots a wound off one of the Goblins. It awakens the final Orc, but at this point, the Umbral Cat is very much out of the bag.

In the Overlord's turn, the Greatax Orc backs away to his yawning buddies, and they all lie in wait, brushing their tusks and changing out of their pyjamas.

A report from Dungeon Saga, Warlord of Galahir - Mission 3: Rise And Shine!

Unfortunately, the Root spell takes a turn to recharge, so we can't keep the Orcling cork in the bottle. However, the Gladewalker moves to their far side and plants himself in their way, as an arboreal doorstop.

The rest of the party piles into the Greatax, even the Elf, who we reckon isn't really needed for shooting in this adventure, as much as lending outnumbering weight to the foes.

The attack doesn't go well, however, and the best efforts of all three fighters can inflict only one wound.

At this point, the Overlord reveals the special rules for Orcs: they can't be killed in a single round, and wounding them sends them into a Green Rage which makes them more lethal.

A report from Dungeon Saga, Warlord of Galahir - Mission 3: Rise And Shine!
HULK SMAAAASH

As we digest the pickle we've placed ourselves in, the Overlord plays a double commands card, and essentially Waaagh!s his way into us. The Greatax swings at us (with his incongruously-named 'Hammertime' ability), the Morax steps up, the Skulk shoots, and the Goblins and Mawbeasts start to pour out of the gaming den to surround us.

All the heroes take a spattering of wound each. Mercifully none are concentrated on a single character, but I think the Elf has to borrow a Healing Potion at this point to stay viable.

A report from Dungeon Saga, Warlord of Galahir - Mission 3: Rise And Shine!

Yes, now I've got them all where I want them! Although those three orcs do look a bit flimsy compared to the full pack of heroes. It took all six of my doubled actions to get this party started, and that's a one-off, so I'm going to have to make quick work of the goodies if I hope to succeed.

Back-to-back, the heroes go to work. The Gladewalker shifts his stance (to ensure the Goblin sneaking up on the Dwarf is now in his front arc, and so outnumbered) and Roots the Morax Orc.

The Dwarf activates his Whirlwind feat and rips through both the sneaky Goblin and the wounded Greatax.

The Elf then steps over the dead orc, downs a Battle Potion and wounds the Morax. The Salamander finishes off with a killing blow.

We've ripped apart the jaws of the ambush, and two-thirds of the quest is complete. Go team!

A report from Dungeon Saga, Warlord of Galahir - Mission 3: Rise And Shine!

The Overlord responds by sending in the fast-moving Mawbeasts to take a bite out of us, although thanks to our judicious use of Mawbeast Treats (acquired in the last adventure) we manage to avoid taking much harm,

The heroes even started handing the damn doggy bags round to each other. The Mawbeasts end up more interested in the food of the heroes than the heroes as food, much to my chagrin. Never mind - plenty of goblins to pick up the slack!

A report from Dungeon Saga, Warlord of Galahir - Mission 3: Rise And Shine!

On the next turn, the Dwarf moves forward to overwhelm the Orc Skulk, but both he and the Elf whiff their attacks. Preferring not to inflict only one wound, and have to deal with a Green Raged Orc in the Overlord's turn, the Salamander steps back and clobbers the Mawbeast behind him.

A report from Dungeon Saga, Warlord of Galahir - Mission 3: Rise And Shine!

We wrap up in our next turn with the Skulk being Rooted to the spot, leaving him open to get smashed by the combined attacks of Dwarf and Salamander.

There is also the bonus mission: the character to kill the second Mawbeast shall earn the title of 'The Beastslayer'. With only the Elf left to play, she swings at the Mawbeast, scores high, but fails to kill it. No cool title for you Thessilar!

A report from Dungeon Saga, Warlord of Galahir - Mission 3: Rise And Shine!

Back at the Tavern

Well, that was a fun mission, although not strictly the mission advertised. Unless the dice rolls favour you, you're really not going to sneak up in the sleeping Orcs, so the 'stealth' aspect of this dungeon is little more than a head start.

(Conversely, if you did manage to reach a sleeping Orc, it would be absurdly easy to win)

Yeah, my reading of the rules in advance left me rather unimpressed. It's a lot of faff for not much return, really, which is a shame. The idea of a stealth level is a nice one, and could be a good change of pace. This mission was more fun than I expected, for all that it doesn't really deliver what it sets out to do terribly well.

The Goblins pouring out of a single chamber is a nice mechanic, and the addition of a second chamber might have made more of a tactical challenge (had we boxed in the Orclings with Elf and Gladewalker, then the majority of the minions would be stymied - and greenskins count on their outnumbering bonus to get damage through).

Though we took more damage than before (it was quite a brawl), I don't think either Leofa or myself felt in danger of losing. I think the problem here is too many Overlord cards - in the best Dungeon Saga missions, the enemy has always been the clock. Even when we've lost due to casualties, it was because we were forced to rush into vulnerable positions. The games either need to be faster, or the dungeons bigger.

Absolutely! Twelve turns for a smallish dungeon is way more than the heroes need here. I'd definitely stick a second similar room of goblins on the far side, too. Even if the heroes are horribly outnumbered, the activation system stops the Overlord totally overwhelming them because you can never activate enough minions. 

So it's a decent premise, but I feel there's a better premise in there.

Yup. For me, if you made this level a wider central corridor with snoozy orcs along it, with some narrow, snaky side passages leading to a goblin barracks, maybe one per orc, then you've got a challenging and exciting mission rather than this novelty diversion. I'd also question the stealth rules, whereby half a room of goblins can get woken but the other half sit about oblivious to the commotion. I can't tell if it was poor wording or a deliberate but limited decision that sets that up, but as the GM, it's pretty frustrating.

And for totting up our tally: three kills for Hrrath, four for Guraf and nothing for the other two. That makes the running tally of kills/experience point as follows:
  • Kapoka (Gladewalker): 2 kills + 0 exp + 1 Haste Potion + 2 Healing Potions
  • Hrrath (Salamander): 1 kills + 2 exp + 1 Haste Potion
  • Thessilar (Elf): 4 kills + 1 exp
  • Guraf (Dwarf): 2 kills + 2 exp
We'll be back in the dungeon soon!

Diamonds Take Forever

$
0
0
Masque of the Red Death Jester

Forever. Forever.
So, with a last burst of productivity, the Eldar army is done. Done for now, obviously, I know how these things go, and I'm aware that there are jetbikes and sundry that may turn up in the fullness of time. Right now, however, the Spocks are out of my system, and I saved the best until last.

Command structure first though! Can't go prancing about in your tights without proper leadership.


First, a trio of Warlocks, splendidly spliced from various Dark Eldar and High Elf bits. Is that an Eagle's Claw Bolt Thrower crew I see in the legs? 

Holy shit! Look at my sword!

A second attempt at reflective chrome for the faceplates, I thought, but otherwise green and white to match with the Guardian units. Gems and faux Eldar runes down their dressing gowns, and they look sleek and sinister like a good Spock should. 


Their Autarch is another conversion, both in jetbike and pumps. That's another High Elf head I see, the rider from the Phoenix. All that previous work is paying off, I really know who's who in the dismembered Helf world. 

Autarchs are sort of like super-Exarchs, I think? Not really sure. Boss level Guardians, at any rate. This one has a Dire Avenger body and what may be a Harlequin sword to go with Caradryan's bonce. 

Bonus gems on the back, three, because he's a hero. They can afford it. 
They can also afford sweet rides in the form of this custom jetbike. 
It's not quite Biel-tan markings, although I have done a broken version of their badge on the other side. But it's not quite not either, with this small brambly gem bush thing. The handlebars don't steer the bike, but they do let him try and roll that red gem into the middle of its little maze on the top.

Despite that, he's still a right old sourpuss.

The iconic leader for craftworld Eldar is a Farseer, though, and here's a very nice standard GW kit one. Lovely model, and it came out well. 

You want to know how smug I am about the gems? That purple one on the bottom corner of his cloak, that's a stick on one and it isn't immediately obvious at first glance in this photo. That's how smug I am.

And that just leaves the Dance Spocks. 

Painted GW Harlequins

The diamonds had me worried. "No problem," I thought, "I'll just look up one of Duncan's nice videos, he'll have some clever tricks to help me,"


Nope. Duncan goes to some length in his video to point out that painting diamonds freehand is quite tricky, and that being slow and careful is your best bet. He is right, damn him, no shortcuts here. Which is why it's been almost two weeks since I last posted anything painted, I've been slowly and carefully building up my arthritis.


Duncan's one handy tip is to half, then quarter the ground when doing lines, helps it stay even. Hah to that - painting thin, straight spirals down a tiny leg is beyond my motor skills, and it took quite a lot of touching up to get these end results. They're good enough, though, even if it gets a bit M C Escher in places.


The colour scheme is relatively muted, Ulthan Grey, Orchide Flesh and Abaddon Black as the main ones. There was a moment when I'd finished the layering when I thought 'actually, these look really good, clean and striking. Sod the diamonds!' But I'm glad I persevered. Feels like a Rubicon to have crossed, somehow, doing a Harlequin squad.


The Troupe Leader has extra bonus hair, a pink lapel gem and the cheesiest of all possible smiles. 
He also got some iconography, because I wasn't somehow exhausted after all the diamonds.

Of all the Grimdark, I like their fluff the best. Not just the acrobatic deadly dancer parts, but their wargear - from the iconic Harlquin's kiss that pokes yard after yard of monofilament wire into your armour, reducing you to soup, to the Creidann hallucinogen launcher of the Shadowseer, it's all golden. But I do have a special favourite.

Not this one! He's a Dark Eldar mashup, a Harlequin on a hoverboard. The painting instructions referred to him as a Joker, so Batman it was for the colour scheme, along with an Eldar-style Mr. J rune.
Not this one either, the Solitaire. He plays the role of Slaanesh in their dances, so he gets purple as his spot colour. His wargear is a newer piece, the Harlequin's Caress - cool, it lets him reach through armour to squash vital organs, but still not the best one.
Here he is from the side, showing off his cloak gems.
Not the Shadowseer either, who is in a very simple black and white motley with Chrome effect mask. Somebody needed something plain, there is a limit to my diamond hatching.
But no limit to my propensity to stick extra gems on.
No, my favourite wargear is the Shrieker shuriken of the Death Jester, both in rules and fluff. The biotoxins make a single model explode (hurray!), then the terror this causes in the squaddie's comrades forces a morale check. If failed, the Eldar player gets to choose which way the unit runs, which is both mean and hilarious in equal measures. Funny guy, the Death Jester.


Red and black so he didn't get confused with the Dark Reapers, who he shares a gun with.

And that's Task Force Spock done!  I shall return to AoS and Reaper for a short burst, but there's a little bit of grimdark still to come before the year is out. The Glottkin is next on my list, and I'll do my best not to paint diamonds on him as well.


All Change!

$
0
0
Like Schubert's 8th Symphony, my painting desk has been racking up the unfinished projects since Christmas. But that's about to ... CHANGE!

Was that too on-the-nose? (on-the-beak?)

As you can tell from our recent Age of Sigmar battle reports, I've been delving into Tzeentch Arcanites (mostly by drafting my Silver Tower set, or borrowing from Kraken's extensive collection). But now I can roll out my own models - starting with the Magister!

This kitbash began last year when he was still called a Tzeentch Sorcerer Lord, and came with the Silver Tower Mighty Heroes set. 

Although I liked the original crazy-eyes/horned head look, it was too similar to the regular Chaos Sorcerer Lord (I'll get around to him too), so I wanted a head swap. 

As luck would have it, the Silver Tower Darkoath Chieftain comes with an option of either a) war axe or b) decapitated Tzaangor head. As no-one would surely wish to deprive Faux-nan the Barbarian of extra weapons, the head was going spare.

Tzeentch Arcanite Magister for Warhammer Age of Sigmar - converted with a Tzaangor head.
I live again!

Even more fortunate, the head was a lot smaller than the actual Tzaangor (which would be totally out-of-scale on this model). And the model even comes with bird feet! Greater machinations were clearly at work here.

Tzeentch Arcanite Magister for Warhammer Age of Sigmar - converted with a Tzaangor head.
Wasn't there a Roald Dahl story where this happens?

The head grafted on easily enough, and aside from some adjustments to the sword arm to accommodate the beast horns, all was well.

I have to say, I think the bird head suits the model better: the beak thrusts ahead, which gives the bent-back pose a bit of forward motion (whereas the original head stands up starkly, as if he's just slipping a spinal disc).

As a bonus, since the bird head was originally sculpted as dead, it has a nice empty-eyed, tongue-lolling expression. Clearly this is one sorcerer who may be considering whether he's gone one mutation too far in his thirst for knowledge.

Tzeentch Arcanite Magister for Warhammer Age of Sigmar - converted with a Tzaangor head.

The painting recipe (as far as I can remember after dabbling away for three months):
  • Skin: Calgar Blue base, Drakenhof Nightshade wash, Calgar Blue drybrush
  • Beak & Feet: Averland Sunset base, Yriel Yellow blended
  • Armour: Retributor Armour base, Reikland Flesh wash, Golden Griffon drybrush; Ahriman Blue
  • Horns &claws: Zandri Dust base, Agrax Earthshade wash 
  • Loincloth: Flayed One Flesh base, Seraphim Sepia wash, Flayed One Flesh drybrush
  • Sword: Stormhost Silver base, Druchii Violet wash, Stormhost Silver drybrush
  • Staff: Sword: Stormhost Silver base, Drakenhof Nightshade wash, Stormhost Silver drybrush; Zandri Dust base, Agrax Earthshade wash
  • Staff Orb: Druchii Violet wash, Genestealer Purple + White Scar highlights
  • Base: Chaos Black, Brown Ink, Agrax Earthshade, Valhallan Blizzard

The new Valhallan Blizzard is not quite as the same effect as my long process with the baking powder, but it goes on easy and is very much faster, which does it for me.

Tzeentch Arcanite Magister for Warhammer Age of Sigmar - converted with a Tzaangor head.

Of course, I do all this to create a unique bird-sorcerer, and then Tzaanuary happens and we get flooded with Shaman, Skyfires, Enlightened and more Tzaangor! 

Outmanoeuvred again by the Great Manipulator!

Remember the Tzaalamo: Tzeentch Mortals vs Slaves to Darkness

$
0
0
Warlock reared up his steed, the creature's dread hooves flailing high in the air, summoning his horsemen around him. Those seven heroes had pursued his coven ever since they had taken custody of the Ark of Alternatives. Now they blundered into his trap and the Disciples of Tzeentch would sink in their talons.

They were great warriors, in their way. Each a mighty champion of the ruinous powers, their weapons soaked red. But against the inscrutable machinations of the Great Architect, they were lost sheep. And sheep, Warlock thought, were born to be sheared. 


Civil war? Not quite -
It's All-Skype Fight Night!


Continuing our Ark of Alternatives campaign, our next fight sees me, Kraken, as the forces of chaos. A small, select squad of infamous Slaves to Darkness, known names across the realms, has mustered to try and destroy the Ark before it can be opened. Can the Tzeentch Arcanists gathered under Stylus's banners (that's me, in bold) see me off?

We're using the Ambush rules from the original Age of Sigmar scenarios. My invading force of heroes has walked into a trap, and the all-cavalry Tzeentchians have me surrounded and outnumbered. Tzeentch has the first turn, although we're both so surprised that nobody can move in the first two turns, and you can either shoot or charge but not both until we get over the shock.

Forces

Maleficent Seven - Slaves to Darkness


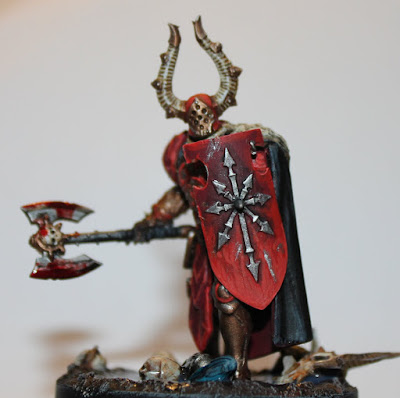
Maelboge Axegod, Chaos Lord on Daemonic Steed - General, Chaos Runeblade, Cunning Deceiver, Counterattack!
Adora Writhegrope, Daemon Prince of Slaanesh - Daemonic Sword
Kelvoran the Breaker, Exalted Deathbringer - Axe and Shield
Jett Bleed, Slaughterpriest - Hackblade and Meteor Hammer 
Brexegalph Ononeironos, Fatemaster
Bloab Rotspawn, Maggoth Rider
Slambo, Slambo

As an alliance of Chaos all-stars, I wanted something from everyone in this list. At least one from all the main gods, so my new Exalted Deathbringer for Khorne, the trusty Fatemaster for Tzeentch and Nurgle's freshly painted Maggoth Rider while it's still in my cupboard. 

Slambo also needed to come and play, although I don't really think it's the best time for him. I need star quality in this match, as I'm going to be horribly outnumbered. I think the Slammer is probably best against large numbers of crappy troops or poorly armoured enemy heroes, neither of which Stylus is likely to field. 

I haven't used the Slaughterpriest yet, so he's in, and the Chaos Lord on Daemonic Steed is a solid pick, able to dish out damage but also well protected. So I just needed something for Slaanesh, and a what better than the ultra-fast Daemon Prince? No specific model, though, and although I went with the Reaper model above in the end, I did consider this oldie for a while. 

Denied again.

Calvera's Changehost - Mortals of Tzeentch


  • E'ly Warlock, Chaos Lord On Daemonic Mount, Nexus of Fate, Nexus Staff, Coordinated Attack
  • Two-Ko the Reprise, Chaos Sorcerer Lord, Runestaff, Steed, Mark of Tzeentch 
  • 5 x Chaos Knights, Chaos Glaives, Mark of Tzeentch
  • 10 x Chaos Marauder Horsemen, Javelin & Shield, Mark of Tzeentch
  • 5 x Chaos Marauder Horsemen, Javelin & Shield, Mark of Tzeentch
  • 1 x Chaos Chariot, Greatblades, Mark of Tzeentch
  • 1 x Chaos Gorebeast Chariot, Mark of Tzeentch
Once we'd decided to homage The Magnificent Seven/Samurai, and with me assigned the bad guys, I knew I'd be going all-cavalry. After that, the list writes itself.

I get to proxy the horse-Archaon (still my favourite Archaon) as the Chaos Lord to lead the charge. Actually, I wanted him to hang back and coordinate things for a while, but when he gets stuck in, I gave him one of the new Tzeentch toys to play with: a Nexus Staff that explodes energy when it slays a hero (handy against an all-hero army). He also gets the Nexus of Fate ability to make my Destiny Dice a little more effective (as if they aren't already).

As his troupe of banditos: a mounted Sorcerer for buffs (he also got a Tzeentch spell that I forgot to use, so haven't bothered to record it); and some Chaos Knights as my shock troops (I have a worrying lack of rend or mortal wound output in the army, so I'm counting on their charge to help me out).

I also reckon the seven heroes would be most vulnerable to missile fire, so I took a full compliment of javelin Marauder Horsemen, split into 10 and 5 respectively, I was hoping these guys would ride circles around the wagons, shooting all the way.

To complete the set: a couple of chariots. I don't have great hopes for their damage potential, but they have enough wounds and a save to crunch into one of the big boys and tie him up for a few turns.


Terrain and Deployment


My team gets to set up in a cover-free box on the north side. My foes lurk anywhere else on the board as long as they're not within 9", so the temptation is to spread out and try and keep him back. 


But I only have seven models, and they're going to need to back each other up or I'll get steamrollered. So I take a (all together now) denied flank approach, and hug the front left corner of my deployment area.


Being Team Ambush, surrounding them seems a good way to go. Since I can't move and charge in my first turn, I'm unlikely to hit with everything, although that suits me, as I want to keep the fragile Marauders at javelin's-reach, and keep the Chaos Knights as a second wave.


The two Chariots get the job of kicking down the door, so they get placed as close as possible to charge (the Chaos Lord has a command ability to help their chances, so he observed from a nearby Ophidian Archway). The smaller unit of Horsemen go on the exra flank, ready to harass the Maggoth.


On the further flank, the Sorcerer leads the Knights and larger unit of Horsemen. They'll have further to travel, but will hopefully avoid early attention from the heroes.


The Maggoth Lord and Daemon Prince are my principal concerns, so I'd want to knock out at least one of them as soon as possible, then try to pick off the smaller champions with missile/magic before crashing in to finish things.

Turn 1 - Tzeentch Mortals


"Charge!"

Obedient to his command, Warlock's chariots lurched forward, both Gorebeast and Chaos Steeds straining under the lash. Eager for glory, the charioteers aimed for the greatest target - the Slaaneshi Daemon Prince - and crashed into their foe.


But before either could act, the Daemon Prince stuck first, hacking away great chunks from the slavering Gorebeast. The charioteers answered with a number of telling blows that cut deep into the ebon skin.

Unable to resist the smell of blood, the Exalted Deathbringer charged into the fray, his own axe adding to the Gorebeast's wounds.


Elsewhere, the rest of the Tzeentchians held back, content to let the reckless charioteers take the brunt of the counterattack. The smaller troop of Marauder Horsemen managed to sting the Maggoth Lord with a lucky javelin throw, but then ducked back into cover before he could see who threw it.

Turn 1 - Chaos Slaves


Faster than the eye could follow, the mighty Daemon Prince's axe flicked out again and again. slashing away at the armoured Gorebeast. It seemed as though the charioteers stood still, shocked by the sheer speed of the Slaaneshi daemon as it sheered through first draft beast then riders, then crushed the shell of the chariot under its dancing hooves. 

The second chariot careened into the towering creature, smashing it to the ground. Too many foes, not enough room to dance.

But even as the Daemon Prince fell, the chaos lord who led this band of legends charged home, backing the play of his Fatelord and Deathbringer. With them lumbered the infamous Slambo, his twin axes ready for the fray. Surely the remaining chariot couldn't hold against their combined might for long?

But not all the heroes were so quick to act. Bloab squatted on his monsterous steed, which baulked and puked in alarm at the ambush. And the Slaughterpriest merely knelt, slicing his own skin gently as he intoned the beginning of a long psalm to Khorne...


Turn 2 - Tzeentch Mortals


Warlock smiled at the unfolding of his scheme. The chariots had drawn out the heroes, now his warband would tear them apart.

With the Daemon Prince banished, he commanded that all forces should focus their attention on their next target: the Maggoth Lord. Then, without further pause, galloped his daemon steed forward, vaulted the shattered wreck of the Gorebeast Chariot and locked swords with the enemy general.


Fortified by protective magic from their Sorcerer, the Chaos Knights charged forward. Alas, the Mystic Shield weighed down their heavily-burdened mounts and the charge petered out to nothing.


Reluctant to charge in alone against the Nurgle behemoth, the large troop of Marauder Horseman quickly changed tack and swarmed around the lone Slaughterpriest: a seemingly easier target, though he managed to avoid most of their javelin volley.


As no-one else seemed interested in taking on the Maggoth Lord, the smaller Marauder Horsemen contented themselves with flinging across a few more javelins to confuse and irritate the beast.


In the heart of the battle, the clash of warriors continued. Beset on all sides, the Chaos Chariot managed to pull down Slambo before being itself chopped to matchwood by the Exalted Deathbringer.

For his own part, Warlock suddenly found he had charged in alone against half the Chaos band, and was too preoccupied with thoughts of betrayal to land a telling blow.


The Marauder Horsemen swarmed around the Slaughterpriest, but none were willing to get close enough to strike a killing blow. The enraged Gorechosen bellowed at them for cowards and slashed at his Hackblade, but could not topple so much as a single rider.

Turn 2 - Chaos Slaves


"All that matters," raged the Slaughterpriest in the thick of the throng, "is that two stood against many!" And then he seemed to realise that his companion, the Deathbringer, was nowhere near, but busy trying to pull the enemy general from his horse. 

"I shall grant you revenge!" bellowed the Malaboge, the leading Chaos Lord. "Counterattack!" 

Instantly, the Fatemaster whisked across the open square to attack the horsemen. And with an earthshaking impact, the blubbery hulks of Bloab and his Maggoth thundered home from the other flank.


Within moments, the ground was awash with the blood of crushed riders, the screams of their horses and the moans of the wounded. Under a pile of dead, flattened by the crush of the fight, the Slaughterpriest lay, but the Fatemaster and Maggoth Lord has already butchered most of the Marauders. 

The two generals fought on, but as their daemonic steeds circled each other, the Tzeentchian focussed his attacks on the Deathbringer on foot. Malaboge took advantage to hammer hard at his foe, certain that his armour wouldn't save him for long.


Turn 3 - Tzeentch Mortals


Blood was seeping through the gaps in Warlock's armour, ichor running down the flanks of his daemonic steed. Had The Great Manipulator abandoned him in favour of another? 

If so, Warlock resolved not to surrender the Ark meekly and drew a halting breath to command his followers.

"Kill the Maggoth!


All the surviving Marauder Horsemen instantly surrounded the monster, securing it in place for a heavy charge to follow up.

With glaives dipped, the Chaos Knights charged into the noxious hide. The behemoth was sore wounded by the manslaughter, but crucially managed to hold onto to this plane of existence, ready to strike back.

Before that could happen, Warlock himself moved to end his duel with the Exalted Deathbringer. Striking down, he plunged his Nexus Staff deep into the Khornite's chest, oblivious to the Deathbringer's counterstroke that drove a Skullgouger up and into his chin.

Both champions fell, slain at the same instant. And yet the Nexus Staff could not be denied, and immediately released the Deathbringer's soul in an explosion of mystical power. Both the Chaos Lord and Fatebringer were sufficiently alert to avoid its power, but the wounded Maggoth Lord was too sluggish and was blasted to pieces.

Turn 3 - Chaos Slaves


Were there so few already? The legends Malaboge had gathered to his banner, the Names of the North, were there now just two standing?

Fatemaster beside him, he spurred his horse-like steed into the nearest Marauder pack. Roaring, they lopped and hacked, but the swift horses of the horsemen were hard to get to grips with, even for the Fatemaster's swift disk. 

The Chaos Knights were reforming, their sorcerer issuing commands. This would have to end soon.

Turn 4 - Chaos Slaves


Not yet! They would not die yet! 

Pushing forward past the horsemen, the last pair of Chaotic warlords drove into the thick of the foe. But there were too many, no room for finesse. Already bleeding from his battle with the enemy's leader, Malaboge found himself engaged by a pair of armoured Knights. Before he could finish the first, the second crushed his arm with an axeblow. He lost the reins and toppled to the cobbles, where the armoured hooves of the chaos steeds trampled him bloody.


Brexegalph the Fatemaster span in ever decreasing circles as the cavalry closed in...


Turn 4 onwards


Twice, the sorcerer tried to blast the Fatemaster with fell magics, but his shield saved him. The blades and bolts of the foe fell away from his armour, or he flew above them, effortlessly skirting their attacks. First one, then another, then a third Chaos Knight dropped as he whisked them out of their saddles, blazing spear plucking them out of the pack and to their deaths.


But there were simply too many. Last on the field as ever, the Fatemaster couldn't dodge every javelin. The Marauders brought him down with a final volley, and the last gasp attempt of the Chaos Gods to retake the Ark of Alternatives had failed. 


As he died, Brexegalph at least took some consolation from the fact that his master would inevitably triumph. Cold consolation, perhaps, but one took what one could in these dark days.


Results


Tzeentch Ascendant! A Glorious Victory for the Disciples.

Locker Room

The suicide charge of the chariots; simultaneous deathblows, a defiant last stand against hordes of cavalry - you can't say Age of Sigmar isn't cinematic!

That was a lot of fun, my plan worked out pretty much as I'd hoped. I think I was always the favourite in this scenario, and I suspect I was lucky it was one of the earliest ones written. Subsequent scenarios tend to put a time limit on games, and if this had stopped at 5 turns, the Fateweaver would still be alive, which at the very least ought to have denied me a total victory.

Still, it was a close-run thing, and if the Fateweaver had ploughed his attacks in the Marauder Horsemen, which were really the only things that could harm him, I might have found myself stymied (and gradually wiped out).

The 'Magnificent Seven' idea makes for a fun scenario, and it works well with the 'anything can kill anything' style of AoS (we tried something similar in 8th Ed, ganging up on Nagash, and the game wasn't nearly so balanced).


For my part, I felt the writing was possibly already on the wall when I saw just how many horsemen I'd have to plough through. Fun all the same, and far closer than I expected in some ways - the counterattack ability that the ambushed team gets is very hard hitting, and the Slaaneshi Prince's 'first strike' rule is also a good leveller.

Slambo, as predicted, was a total washout. I think he might have nicked the chaos chariot once before getting trampled? And I did forget his double pile-in rule in the thick of things. Not really his moment, this, I think he's probably better suited to fighting less capable opponents, the bully.


I probably should have tried to move away from the cavalry charge more, too. We did slightly fall into the classic AoS trap, in that the game was a big melee in the middle of the field. All that carefully laid-out scenery was just window dressing in the end.


To be fair, though, we'd actually ruled that to be the case. My collection is really geared for more skirmishy games than AoS, but it was nice to whack most of it out at once. The only terrain that actually counted (other than giving Stylus cover in his first turn) were the Realmgates, the Archway and the Wood, and it's just as well we didn't bother looking out the rules for anything else as we'd never have used it!


Well, the Tzeentchians are running away with this campaign pretty much unopposed so far. Time to get the Ark to where it needs to be, so that they can open it and usher in a new age...


Warlord of Galahir: Double Trollble

$
0
0
Warlord of Galahir rides again! And if you liked the starting mission, where the quest was to kill a Troll; you'll love this one, where we have to kill... two Trolls!


Not straining the imagination much, are we?

I don't know, it's just sticking with the classic rules of sequels. If it worked first time, do it again but more. Kraken here, boldly leading the hapless greenskins against the so-far unstoppable heroes.

Mission 4: Bouncers

The map opens with two adjoining rooms, linked by a wide corridor where our heroes are stationed. In each room is a Troll. One Troll always tells the truth, one of them always lies. This has no bearing on the mission, but you have to add flavour where you can in this game

A report from Dungeon Saga, Warlord of Galahir - Mission 4: The Bouncers.

Lured by the prospect of two whole doors, we all move to attack the left-hand Troll (except for Kapoka, who stays put and Roots the other Troll in place).

This is just making my job easier. With only one activation per turn anyway, now I don't even need to worry about which one to pick.

While the Elf sneaks around the back for some rear-attacks, the Dwarf and Salamander charge straight in there and knock off three wounds. Good start!

A report from Dungeon Saga, Warlord of Galahir - Mission 4: The Bouncers.

In the Overlord's turn, he chops a wound off the Salamander, but can do little else to buckle under the weight of numbers as Kapoka also flanks him, and the Salamander returns the favour and kills him. One down!

Zoicks. Trolls are pretty tough, but I guess expecting them to weather a four-hero onslaught for more than a turn or two is a taller order than I hoped. Trolls are large, so they always count as outnumbering their attackers. Even so, it's amazing how fast your dice vanish when the good guys start ganging up on you.

A report from Dungeon Saga, Warlord of Galahir - Mission 4: The Bouncers.

While the other Troll scurries backwards to guard his rear, we kick down one of the doors (which all lead to the same corridor, filled with Orclings and our final destination door. This mission would be a breeze, except we can't complete it until the other Troll is dead.

At this point, we learn that over half our allotted time has expired (that went fast!). Unlike Dwarf King's Quest, running out of time isn't an automatic fail, but we are ominously told that ... something will happen.

I've been ominously saying so for three levels so far. It's getting kind of annoying, I expect, although it still beats the fluff in terms of foreshadowing.

A report from Dungeon Saga, Warlord of Galahir - Mission 4: The Bouncers.

Since the Troll isn't going to meet us, we traipse over to the other side of the dungeon to confront him.

A report from Dungeon Saga, Warlord of Galahir - Mission 4: The Bouncers.

At which point, the Overlord manages to draw some extra cards and our time is up! We hear the sound of goblin horns, and learn that for every additional turn, an extra Orc or pair of Goblins will appear at the starting blocks. And so on until we are drowned in the Green Tide.

Yes, it's going to look like a London park pond in high summer down here. Might smell better, mind.

The first to appear is an Orc Greatax (who is a tougher prospect when they're awake), who sneaks up to the Salamander's rear and starts chopping wounds off him.

A report from Dungeon Saga, Warlord of Galahir - Mission 4: The Bouncers.
Ominously, even  the camera filter went a shade of green.

Unwilling to stay and get swamped by more greenskins, we elect to break from combat (taking more wounds in the process) and pile in on the last Troll.

After the Dwarf has dealt him a wound, the Salamander quaffs a healing potion and hacks away, using his Relentless ability to double his attacks and inflicts a whopping four wounds on the Troll.

He thereby personally slays both monsters, wins the secondary mission, earns the title 'Trollsbane' and douses in their blood, gains the Regeneration ability for the rest of the mission.

... or that would have happened, if the Troll hadn't regenerated his last wound. Damn.

A report from Dungeon Saga, Warlord of Galahir - Mission 4: The Bouncers.

In the subsequent turn, we do finish off that Troll, and so only need to open the final door to win. This is made more problematic by the appearance of two Goblin Spitters, and the gnawing sensation of a Greatax hacking away at the rear of the Salamander.

A report from Dungeon Saga, Warlord of Galahir - Mission 4: The Bouncers.

While the Dwarf tries (and fails) to get the corridor door open, and the Elf and Gladewalker collectively try (and fail) to kill the Greatax, the Salamander turns and finishes off the foe who has accounted for almost all of his wounds.

A report from Dungeon Saga, Warlord of Galahir - Mission 4: The Bouncers.

But before he can savour that victory, two Goblin Spitters creep up and fill him full of arrows. There are no more healing potions, and even expending one of his precious experience points won't help. Lizard down!

A report from Dungeon Saga, Warlord of Galahir - Mission 4: The Bouncers.

As the surviving three adventurers drag their wounded comrade to safety, we fail the mission.

Back at the Tavern

Our first failure in the Warlord of Galahir campaign, and despite its simple layout, this seems like a pretty unforgiving level.

Yeah, it's a very short period of time to get a lot done. My deck is seven cards, three in hand to start with, so you're going to want to get it done in five turns flat. Not easy.

Both Trolls are killable by the party, but with so much of the action taking place by the entry point, and so little time available, the odds are good that you'll have to face at least some new greenskins steaming in towards you.

Interestingly, the only level that really stymied us on Dwarf King's Quest involved a room containing two Trolls, so maybe there's something in that.

And equally interestingly, there was a level midway through the Infernal Crypts campaign that Kasfunatu and myself found had a similar massive difficulty spike. So much so we skipped over it in the end, it got tired fast. The more I play this game, the more the balance seems skewed. Mostly in favour of the heroes, but with occasional shifts right back the other way. 

Leofa is also finding his two heroes are a bit dull to play as. The dwarf, I guess, is a matter of opinion - he's solid and rather unimaginative, but a relatively effective tank-type fighter. Kapoka I agree, though, is not terribly exciting to play as. 

He's got no good offensive options and his large range of defensive spells only work on himself. He seems designed to run up and let people hit him to be effective, which would be great if he could actually fight. But he can't, so he's not very rewarding to play as. Even with his spells up he's not resilient enough to last long on the front line, and he can't really buff the others effectively either. Lurking in the background adding little beyond weight of numbers isn't the most dynamic role for a hero. Might as well rename him Bardy the Bard.

As a result, these two might get written out and replaced with homebrew characters in the future. Obviously this is going to really spoil the fluff, so I'm very anxious about it.

For housekeeping, our diminished pool of points and potions are as follows:
  • Kapoka (Gladewalker): 2 kills + 0 exp
  • Hrrath (Salamander): 3 kills + 1 exp + 1 Haste Potion
  • Thessilar (Elf): 4 kills + 1 exp
  • Guraf (Dwarf): 3 kills + 2 exp
Despair not, I'm fairly sure I know were we went wrong, so we'll beat it on the replay!

Sheriff Fatman

$
0
0

Unclean! Unclean!


It's a lot smaller than it looks on the box.

The End Times models never looked better than the Nurlgle ones, in my opinion. Not that I didn't like the Stormfiends, Nagash and his boys and Archaon's ascension to giant chaos dragon. But the Nurgle stuff was the best. It stuck with the original fluff whilst updating the models to new extremes. 

Fly runes aplenty. Someone's sacrificed a nice juicy heart on this one.
Here's one made of skulls.

And another one.


And another one. Just to test yourself, see if you can guess how many skulls the Glottkin have modelled into their crevices between them. Answers in the comments below, and I'll give your the real answer some time next year once I've tallied them all.

So I was well pleased to get a commission to do the Glottkin from Kas. If I was a bit iffy about the model at the time it came out, the years have mellowed me. Back then, it seemed busy. Too much going on, especially at the top, and rulewise it was a bit of a flop. Huge, tough, killy and entirely too vulnerable to getting wasted by the cray-cray spells that 8th Ed End Times Magic was made up of. 

"Hot dogs! Hot Dogs!"

It's like a tiny jacuzzi for Nurglings.

Different story now, I think. A massive damage soaking tank that spews regenerative magic and bile in equal measure? Yes please. Lots of points, otherwise I'd consider it for the Woffboot, but I'd like to see it in action at some stage. I can think of some damn Tzeentchians who could tempt it out for a stroll in the future...

I've painted some pretty gross model taints in my time. This rotting modesty cloth covers the bulbous horrors of the Glottkin's nether region, but not well enough. It is Fugly back there, I'm telling you.

Seeing as I'd done yellow pimples on the Maggoth rider, I went for blood blisters this time round. Abaddon Black, sloppy Red Ink wash overlapping the nearby tissue a bit, a Ulthuan Grey highlight and then BftBG over the top. Don't Google boils like I did, but take my word for it that this is closer to what massive boils look like in real life than the yellow ones.

Anyway, the painting. A three-stage effort, this, he's actually been under way for two months. I did the hunchback-riding brothers during my marathon spree in February, and they've already appeared on GW's Flickr feed since then. 

Here's Otto, the brother with the inevitable scythe.
Just as blobby from behind, too.
This is Ethrac, the sorcerous one.

Nobbles and skulls and pimples, check. Lopsided horns, check. Fly rune, check. Tentacles and maggots, check. I'm not criticising here, GW, just saying good job with sticking to the IP, that's all.
And here's Ghurk, who we've been admiring all along, really.
He really is pretty massive. The riders will get magnets in due course, but he can happily be fielded as a Great Unclean One until the new one comes along later this year. I'm going to predict that one will be more like the original art, fatter round the bottom and not as tall as this guy. But we'll see.
All aboard!

Just time for a little spot the difference challenge, as I leave you for this month. Still more of Kas's giant models left to do, but only a few to go.

The Birdmen of Silvatowaz

$
0
0
I may have been too slow for Tzaanuary, so let's pretend my deadline was for the start of Tzaapril!

Tzaangor from Warhammer Quest: Silver Tower, Age of Sigmar

Let's crack on with these blue meanies!

These are the Tzzangor from The Silver Tower set. As is right and proper for a Tzeentch unit, I have very conflicted thoughts about them.

I love the models, they may be my favourite lot from a box set that is filled with many strong contenders. That said, I was so deterred by painting them, they stopped me in my Silver Tower tracks for almost a year.

Tzaangor from Warhammer Quest: Silver Tower, Age of Sigmar

I mean, they looked good - but there's inhuman skin, beaks, claws, feathers, horns, armour, weapons, amulets, gems and good deal of other stuff going on. Not to mention the wide possibilities of colour schemes. And the base models were so good, I didn't want to stuff them up.

Tzaangor from Warhammer Quest: Silver Tower, Age of Sigmar

The release of the Disciples of Tzeentch battletome proved just the kick I needed to shake off that slump and crack on with them. That said, the colour scheme I eventually chose was the standard 'Tzaangor Blue' (or 'Cult of the Transient Form' to be precise). I may have gained courage, but still lack imagination.

Tzaangor from Warhammer Quest: Silver Tower, Age of Sigmar

These finished three are the standard models from the Silver Tower set, and the colour recipe as follows (it's a laundry list, so feel free to skip down to the good stuff):

  • Skin: Calgar Blue base, Drakenhof Nightshade wash, Lothern Blue drybrush
  • Horns, hooves and claws: Zandri dust base, Agrax Earthshade wash, Zandri dust drybrush
  • Claws and beaks: Averland Sunset base (wet-blended), Agrax Earthshade wash
  • Feathers: Screamer Pink base, Carroburg Crimson wash
  • Dreadlock/tentacles: Druchii Violet wash, Lothern Blue blend
  • Mail kilts: Celestial Grey base, Drakenhof Nightshade wash, Nuln Oil wash
  • Cloth kilts: Celestial Grey base, Drakenhof Nightshade wash, Ulthuan Grey layering
  • Armour and shields: Retributor Armour base, Reikland Flesh wash, Golden Griffon drybrush, Ahriman Blue layer
  • Shield bosses: Kalabite Green base, Nuln Oil glaze
  • Weapons: Ironbreaker base, Druchii Violet wash, Stormhost Silver drybrush
  • Weapon hafts: Charcoal Grey base, Celestial Grey drybrush
  • Tongues: Pink Horror

There are certainly more paints to list for gems etc, but damn, these are a riot of colour!


Tzaangor from Warhammer Quest: Silver Tower, Age of Sigmar

The next three Tzaangor are some kitbashes from the Silver Tower set. It would hardly be appropriate to have anything consistent from Tzeentch.

Tzaangor from Warhammer Quest: Silver Tower, Age of Sigmar

The weapon swaps look effective enough, although they're not as easy as the old interchangeable heads, torsos and weapons of yore. But that's a more than fair trade-off for a better individual model - after all, no-one's making horde armies from these.

Tzaangor from Warhammer Quest: Silver Tower, Age of Sigmar

I still can't get over how these models have soaked up practically every colour on the palette and still retain their uniformity. They've been sitting on my painting desk next to some half-finished Khorne troops (all red armour and bronze trim) and the contrast between the two is fantastic.

I always felt that Tzeentch and Khorne were more diametrically opposed, rather than the canon Khone/Slaanesh, Tzeentch/Nurgle split.

Tzaangor from Warhammer Quest: Silver Tower, Age of Sigmar

But enough chaotheology - here is the trio of converted Tzaangor. At a glance, I do sometimes forget which is the original mould and which ones are kitbashed.

Tzaangor from Warhammer Quest: Silver Tower, Age of Sigmar

However, these six were not sufficient for a tabletop game of Age of Sigmar. I needed to bring them up to their minimum of 10 models, and get some command units in there.

Although there is a new Tzaangor kit out there (and I've not written off getting that too), the aesthetic is slightly different (fewer damn details, for one) so wanted to convert more Silver Tower miniatures.

Fortunately, some bright spark appears to have purchased a stack of Sliver Tower sets and is flogging off the components on eBay. He seems to have done very well, considering I got the last one from '120 sold', although it does raise the question of what he will do with 119 extra Doomseekers.

Tzaangor from Warhammer Quest: Silver Tower, Age of SigmarTzaangor from Warhammer Quest: Silver Tower, Age of Sigmar

The brayhorn was simple enough: replacing his weapon with the horn from Chaos Warriors. I've added a shot of the rear view to illustrate just how much is going on with these models: spare weapons! More gemstones and amulets! Extra feathers?

Tzaangor from Warhammer Quest: Silver Tower, Age of Sigmar

The best choice for the Icon Bearer was the Greatblade model, though I put his back foot on a couple of skulls to raise the inclination of the banner pole. A goblin spear haft gave some extra height, and the Chaos Warrior icon tops him off.

Tzaangor from Warhammer Quest: Silver Tower, Age of Sigmar

As well as the conventional command groups, the unit can also have a Mutant. The box set mutant has its head splitting in half, which is both awesome and difficult to see how that would translate into an extra attack ('what is the sound of one break pecking?'). I went with an extra arm, donated from a Gor, which gives a more straightforward rationale.

Tzaangor from Warhammer Quest: Silver Tower, Age of Sigmar

And finally the Twistbray. I was planning to just transplant some bigger Chaos Warrior horns onto the champion, but decided to go full potato and replace the top half of his head with the skull icon from the Chaos Knights.

You can't see from this angle, but the lower half of his beak is still below the mask, so it came out pretty nicely.

Tzaangor from Warhammer Quest: Silver Tower, Age of Sigmar

And so completes this wee unit of Tzaangor. I love the look of them, and I had a blast painting them, but since each one took more effort than a lot of character models I've previously painted (easily twice as much as the Magister model for example), so I won't be adding to them any time soon.

That said, they gave a hell of a first impression on their debut battle, so who knows where the winds of change will blow?

They Won't Stay Dead

$
0
0
Guess Whose Back?
When there's no more room in hell, my lead pile will walk the Earth.


Back once again with the renegade master the undead of Dungeon Saga, this week. It's a last blast on these for me. Not a terribly welcome one, I must admit. Painting ground I've already covered once feels like a chore, and nice though these skellies are, there's only so much you can do with them.


I mean, you could do freehand shield designs on the swordsmen, but there isn't a lot of room. Quarters and stripes were all these guys got. The one slight flare I could think of was giving them glowing hearts as well as eyes, a sort of necromanticardio work-up. Something a bit different, anyway.


If you guessed that it was their master's back, you were right.


Mortibris does at least lend himself to a little bit of elaboration. Room on his cloak and robes, as well as the opportunity for light sourcing. He's come out a bit disco, though, not sure it's quite what I intended. Ah well, I could always go over it one last time ha no what am I saying, he's going in the box and quite possibly never coming out in person ever again.


I also did a box, purely to taunt Stylus.

It's an open and shut case, detective.

But also as a cryptic teaser for the next batch, which is something of a treasure trove.

One Man And His Bird-Dog

$
0
0
So after a year of painting the miniatures (okay, painting half the miniatures, don't look at me like that, leadpile), I finally got in my first game of Warhammer Quest: Silver Tower.

Gryph-Hound from Warhammer Quest: Silver Tower.

I had a blast, and was immediately inspired to pluck one of the heroes from the unpainted stack

(don't worry, it's not just the Gryph-Hound)

It's the Warpriest! The Excelsior Warpriest, if you want the full title and are a fan of Marvel Comics editorials.

I believe this is the first (and to date, only) 'regular human' model for Age of Sigmar, and it's a good one. Nice pose, nice detailing and a good overall outfit: stentorian, with a mix of warhammer, prayer book and even a reliquary hanging from his belt. The stole hanging from the back of his cloak is reminiscent of the sash worn by the Knight-Questor, which ties them both together as followers of of Sigmar.

Excelsior Warpriest from Warhammer Quest: Silver Tower.

Although he'd have no trouble fitting in with the 8th Ed Fantasy warrior priests, he does come with some intriguing keywords ('Celestial', 'Devoted of Sigmar').

It would be nice if the human factions were revisited with some proper Age of Sigmar Sigmarites for him to inspire (rather than just having the Flagellants, who seem very Old World)

Excelsior Warpriest from Warhammer Quest: Silver Tower.
Layering! I did actual layering!

I went with classic colours for this model, since red, white and gold make for a great combination. As the cloak was so dynamically sculpted (take note Valandor), I broke from habit and eschewed my wash n' drybrush for a bit of layering. I was quite happy with the way it turned out, and though I won't be pouring away my inkpots any time soon, it's nice to have another technique in the armoury.

Colours as follows:
  • Skin: Steel Legion Drab base, Agrax Earthshade wash, Zandri Dust drybrush
  • Gold trim: Retributor Armour base, Reikland Flesh wash, Golden Griffon drybrush
  • Tunic: Celestra Grey base, Drakenhof Nightshade wash, Ulthuan Grey layers
  • Cloak: Khorne Red base, Mephiston Red layers
  • Stole: Flayed One Flesh base, Seraphim Sepia wash, Flayed One Flesh drybrush
  • Book: Ushabdi Bone base, Agrax Earthshade wash (Cover: Skrag Brown; Ribbon: Pink Horror base + Carroburg Crimson wash)
  • Boots & Gloves: Charcoal Grey base, Nuln Oil wash


Gryph-Hound from Warhammer Quest: Silver Tower.

And I could hardly paint the Warpriest, without Budgie, the littlest Gryph-Hound.
  • Skin: Balor Brown base, Seraphim Sepia wash; Ulthuan Grey for underbelly
  • Collar: Retributor Armour base, Reikland Flesh wash, Golden Griffon drybrush, Reikland Flesh glaze in recess
  • Scales: Wazdakka Red base, Carroburg Crimson wash
  • Beak: Charcoal Grey base, Celestra Grey drybrush


Excelsior Warpriest and Gryph-Hound from Warhammer Quest: Silver Tower.

The game itself was cracking (no battle report, as I was both learning and playing with ... unpainted miniatures). Leofa and I took on the first mission with a strike team consisting of a Tenebreal Shard, Tzeentch Sorcerer Lord, Darkoath Chieftain, with the Excelsior Warpriest to add moral guidance.

All the heroes managed to find sufficient common cause to work together and complete the level (having to banish the Gaunt Summoner not once, but twice). So that's one of the magical McGuffins safely in the bag, and looking forward to squeezing in the next quest (in between dungeon sagas and narrative campaigns).

One (and a half) more heroes painted, and with plenty more to go, I'm not even considering the two hero expansion sets, or the new Warhammer Quest box set, or the 44 additional heroes that would make up the set.

Nope, not even thinking about it. Not one bit.

Mini Star Destroyer

$
0
0
Image result for mini star destroyer

A long time ago in a galaxy skype skype away...

Bit of a late report here, so let's not dwell too much on the details. Two fast-paced fights from a short-notice game between Kraken and Kas here. We'd been hoping that Kas's new Wave 10 models would be in play, but the postman let us down. My lists were all Quadjumper based, so I botched together some alternatives and we set to anyway. 

MINI STAR DESTROYER

100 points
64 points
Rear Admiral Chiraneau
8

 3

 0

 12

 4

 
VT-49 Decimator, Unique
When attacking at Range 1-2, you may change 1 of your  results to a  result.

Adrenaline Rush (1)

Cluster Mines (4)

Inspiring Recruit (1)

Agent Kallus (2)

Kylo Ren (3)

Advanced Proton Torpedoes (6)

Tactical Jammer (1)
4
3
2
1
12 points
Academy Pilot #1
1

 2

 3

 3

 0

  
TIE Fighter
5
4
3
2
1
12 points
Academy Pilot #2
1

 2

 3

 3

 0

  
TIE Fighter
5
4
3
2
1
12 points
Academy Pilot #3
1

 2

 3

 3

 0

  
TIE Fighter
5
4
3
2
1

Turn 1

My plan here was to use the big tanky ship as a big tank, and nip all the little crappy TIEs about as chaff and flankers, but basically to try and keep them together and alpha strike as hard as possible. With this in mind, we flew in a nice straight line towards the enemy, who looked like they had a similar idea.


Turn 2

And sure enough, we all set to jousting at close range shortly afterwards. Kas's paired Protectorate Starfighters zipped off to the side, ready to sweep in behind my line, but one of them had run into asteroid-based problems and was a little too busy swerving to shoot.

The Vindicator lost all its shields, but the advanced scanner lock let me use the Proton Torpedoes at close range, which was more than enough to take out a Protectorate fighter. I even had time to let the TIEs start plinking the shields off the Hound's Tooth.


Turn 3

The big ships faced off at close range as the Hound's Tooth braked while the Decimator slowed to a crawl. The TIE line K-turned, although one of them was wounded and broke away to the right.


That left one of the Protectorate fighters right in front of the TIE line, and despite their fearsome close-range shooting prowess, it was whiffle time. All of my ships that were able to focussed their fire back on the hapless pilot, and down he went, just leaving the big freighter. At least it managed to burst a TIE with close-range fire from its cannon.

Turn 4

As the two big buses bumped uglies in the middle, the TIES started manouvering for a second pass on the Hound's Tooth. The Decimator dropped a line of mines, knowing that the big scummer would struggle to get past them,


Turn 5

In the event, the mines proved irrelevant. Already battered, the big ship couldn't evade the fire from all three opponents and exploded, throwing out its Z95 lifeboat. This could easily avoid the minefield, but could it now take on the odds stacked against it?


Turn 6-9

TL;DR - no, no it couldn't. It did struggle gamely, but even after I obligingly fatally flew one TIE into an asteroid, the Z95 just didn't have the firepower to trade blows with the deadly 360-arc turret on the Decimator.

Both TIEs line up on the Z95, which tattoos its name into the ridiculously thick hull armour of the Decimator

The TIE on the left explodes in the central asteroids as the Nashtah Pup head south
And then sensing the overall drift of the battle, the armed escape pod does exactly what it was meant for, and escapes off the bottom of the table rather than fight the Decimator any more.

That took us about an hour, and Kas was spoiling for a rematch after a disappointing performance from the Scum, so we lined up a new fight.


K Wing vs Phantoms Game

This time, I went with the Rebels, the faction I'm least familiar with. I like bombers, and the K-slamming K-Wing feels like fun, so I take one of those loaded for bear with a light screen of fighters.

JUST 4 KIXX

100 points
51 points
Miranda Doni
8

 2

 1

 5

 4

  
K-Wing, Unique
Once per round when attacking, you may either spend 1 shield to roll 1 additional attack die or roll 1 fewer attack die to recover 1 shield.

Dorsal Turret (3)

Extra Munitions (2)

Seismic Torpedo (2)

Cluster Missiles (4)

Jan Ors (2)

Cluster Mines (4)

Proximity Mines (3)

Advanced SLAM (2)
3
2
1
25 points
Jess Pava
3

 3

 2

 3

 3

  
T-70 X-Wing, Unique
When attacking or defending, you may reroll 1 of your dice for each other friendly ship at Range 1.
4
3
2
1
24 points
Blue Squadron Novice
2

 3

 2

 3

 3

  
T-70 X-Wing
4
3
2
1

Turn 1

The overall plan is to get the K-Wing in, close and bomby, then try and mop up survivors with the faster, more manouverable escorts. The main problem with this is that I have almost no idea at any given time where those damn Phantoms actually are, or how I'll hit them with bombs.


Turn 2

And I'm so busy worrying about it, I screw up and collide the escorts into each other as they try to close. Jess Pava immediately starts taking hits from the incoming TIEs.


Turn 3

The main consolation I have is that when the Phantoms decloak, Miranda can at least shoot at them before they vanish from the scopes again, as I have initiative. That's not much help, though, as my turret is pretty weak sauce, and I can't get a bead for the missiles I'm carrying.

Again, my escorts collide with each other and generally flap about being ineffectual, while the TIEs run rings round me, sniggering.


Turn 4

I manage to nail down one Phantom enough to scratch it a little at the top end of the asteroid field, but at some cost. Miranda is hurting enough that her already feeble turret is made even more feeble as I repair her shields. And Jess Pava is looking very ropey, limping along on her last hull point.


Turn 5

Again, I can't really pin the Phantoms down, and even when I can, they're cloaked and nearly impossible to hit. Jess explodes after Kas outguesses my attempt to run her to safety.


Turn 6-8

The Phantom Menace starts chipping away at Miranda, who I can kind of keep steady by regenerating shields, but can't really manage much damage with.


A spread of proximity mines manages to clip one of the TIE at least, who recovers from the damage in an asteroid field and gets sniped by the Blue X-Wing pilot before it can recover. But it's not looking good for me - even Blue is hurting now, and I've yet to make headway on the Phantoms.


The only ray of sunshine is my surprise use of Seismic Torpedoes. 

I'd always written them off as expensive and situational, but I hadn't previously noticed that you fire them as an action, rather than using locks. So Miranda can, for example, perform an Advanced SLAM and launch them, which catches Kas on the hop and dings a Phantom as well as blowing up the asteroids. Fun!


Turn 9-10

But that's it for sunshine for me. After that, the Phantoms poke Miranda to death...


...and when Blue tries to run for cover, they easily follow, catch and kill him. Game!


Airlocker Room

No big revelations for me from these games. Fun to shop about a bit, but I think I prefer Scum lists to Empire or Rebels. I do start to see the power of a good swarm, though, that you can concentrate a lot of fire even from rubbish ships. With good positioning, there's not a lot your opponent can do other than brace and hope to weather it.

Apart from that stunning tactical insight, I also have discovered I dislike TIE Phantoms immensely.

Quadroplegia

$
0
0
Finally! The Quadjumper is here!

Image result for quadjumper explodes
Let's use it to escape!
Here's my list, which sacrifices pretty much any shielding for some very manouverable, hard-hitting jousters. Plus bombs, which I now feel I cannot do without in one form or another.


SHIELDS DOWN

100 points
33 points
Kad Solus
6

 3

 4/3

 4

 0

   
Protectorate Starfighter, Unique
After you execute a red manoeuvre, assign 2 focus tokens to your ship.

Deadeye (1)

Plasma Torpedoes (3)

Concord Dawn Protector (1)

Stealth Device (3)
5
4
3
2
1
39 points
Guri
5

 3

 3

 4

 1

   
StarViper, Unique
At the start of the Combat phase, if you are at Range 1 of an enemy ship, you may assign 1 focus token to your ship

Expert Handling (2)

Flechette Torpedoes (2)

Virago (1)

Autothrusters (2)

Cloaking Device (2)
4
3
2
1
28 points
Sarco Plank
5

 2

 2

 5

 0

 
Quadjumper, Unique
When defending, instead of using your agility value, you may roll a number defense dice equal to the speed of the manoeuvre you executed this round.

Boba Fett (1)

Proton Bombs (5)

Pattern Analyzer (2)

Dead Man's Switch (2)

Turn 1-3


Turn 4-6


And it gets worse for him from here on in. 


The action wanders off the north edge of the camera for a while here, but basically the Phantom tries to loop back while the Protector scrambles past my ships for cover. Cover he doesn't find - the dastardly Quadjumper's reverse move catches him by surprise, and he's still getting shot at.


Meanwhile the Protectorate Fighter and the Starviper prove to be agile enough to keep up with the Phantom. Kad Solus has a great ability - pull anything red and get two free focus, which is very handy for a Deadeye round of Plasma Missiles to the engine ports, which takes out the TIE Protector from range.

And as long as Guri stays close, he gets free focus too, so the two of them are quite hard to pin down whilst also hitting hard. He dances round with the Phantom, neither of them quite getting to grips with each other, but keeping busy all the same.


The Quadjumper just ploughs back and forth over the same furrow. It's not a powerful ship, but it's very hard to pin down, especially with a barrel roll in hand. The Phantom struggles to get away from everyone, ends up surrounded, and pops shortly afterwards. 

That's that - I'm barely even scratched, despite my no shields, and the Imperials are all spaced! It's all over so fast, we switch table edges and play the two lists again.

Rematch

Turn 1-3

We start in opposing corners again, so the first few turns are mostly about moving into position. 


Both of us fly in straight packs towards the middle of the table. 


Over the next two turns, Kas takes a fast route for the middle, whereas I fly straight for another turn before taking a hard left to present a solid firing line down the middle. 


Alas, Kas once again comes unstuck. His Phantom ends up uncloaked directly in front of both Quadjumper and Starviper, and once more the Dice Force is with me. Pop goes the Phantom, which even manages to whiff its attack in the process. Grim stuff. 

Turns 4-7


After this, it just turns into dice carnage. The remaining TIES try to regroup and sweep in together, but I more or less hold position across my corridor in the asteroids. 


The TIE Protector is the first to fall foul of my line, as the Striker is (as expected) very nippy, easily dodging round me and staying out of trouble. Taking an unlucky crit from the Quadjumper, though, I use Boba Fett to chop out the Protector's damage-enhancing tach kit, which leaves it feeling a bit toothless. 


The Protector runs off, but Solus can keep up with it, and they both make a long, slow arc through the bottom of the board while the others dogfight at close range.


Before the Protector can make another pass, Solus takes it out while the others carrying on zooming about, trying to get good positions. By way of celebration, he spends the next couple of turns flying into big rocks. 

Turns 8-14


Once again, Kas is surrounded and outgunned, but refuses to go down fighting. 

Over the next seven turns, we fight an extremely involved game of cat and mouse. The Striker pulls off some very mean flying, avoiding my Proton bombs and the bulk of my fire, then evading what I manage to throw at it. 

I'll skip over the details as these photos are frankly pretty useless at showing you what's going on. If you think it's bad, just bear in mind that it's the view I have over Skype, which probably explains why I die in Asteroids so much.


It's also, in the end, just too much to fight off. Although the Striker does manage to kill Kad Solus, critting the last of his asteroid-batttered hull away in a close-range joust, Guri stays focussed long enough to bring down the lighter, faster craft, and I'm two games up with a surprisingly powerful Scum list.

Airlocker Room

Well, I enjoyed that! Dunno if Kas did quite so much...

Particularly the last game, which was extremely hard fought and tense in the latter bits. You know, the bits I skipped over in the narrative. It really was a tangly, loopy dogfight, but it just didn't make the transfer to the page very well. 

The Quadjumper is my new favourite ship. I mean, it's terrible, it's frail and lightly armed. But those backward moves! The original plan was to throw the bomber in as a blocker and get the mileage from Proton Bombs, Boba Fett and then the Deadman's Switch, but in both games it came away relatively unscratched. 

As well as being a blast to fly, it was also very good at catching TIEs unawares by reversing out of their way and leaving them in its sights. I could also see myself enjoying using the slightly more expensive version that lets you throw bombs forward while you fly backwards. That plus Bombadier would be worth a go on another night, I think. 

The Scum fighters are both strong choices, hard hitting but manouverable. First time I've felt the value of the Starviper, that's a mean ship, and I think Guri is a good pilot for it. Might try Prince Xisor with a swarm of underlings some time too, though. 

Good stuff, all in all. Roll on wave 11!

It Will Not Die

$
0
0

Image result for mystery

So before you head on past the page break, see if you can guess what I've been painting this week. Go on, pick something. I feel confident I can surprise you.


Not with these, obviously. You'll have seen these coming a mile off.


The Mantic Zombie Parade is out, and it's nice to wave goodbye to this lot. As with the skellies, decent sculpts, but really not very inspiring to paint them again. The main joy is that there's only a single batch of Dungeon Saga left to go (not including the interminable jumble sale of furniture, of course) before I have a fully completed set in the cupboard.


The Zombie Shaman came out a bit better than the last time I did him, I think. A better palate of colours, apart from anything else.


And I did my copy of Blaine. Can't stand the model, can't see why they make such a deal of him being in all their games. Yeah, it's the Predator with a slight fantasy twist. He's got a blobby head and rubbery-looking skulls on his belt. I painted him like a Genestealer and I'm glad never to have to do him again.

Now that the chaff is out of the way, I can get on with trying to surprise you.


Okay, maybe you predicted these too, with your Trumpesque foresight. It's the other half of the Frostgrave Barbarian warband I started a while back, the blue-and-black scheme with the Mind Flayer wizard.

Damn Harlequins have ruined me for shield designs.
This was a bit more vikingy. Better.


Now to convince anyone to play Frostgrave again.

But there's a blast from the past hiding amongst them. Spot him?


This guy is an 80s Citadel Barbarian, from a blister pack my brother bought. You can tell he's 80s, his spear heads aren't bigger than his shins. And he wasn't alone. Deep in the bowels of our cellar, a plastic bag was lurking. A plastic bag that held the contents of my bitz box from about ten years ago...

Mrs Kraken was hunting through the wreckage down there looking for the right size welly boots for our girls, and came back with the plastic bag. "Do you want this?" she asked. "Is there anything in there that's any good?"

Most of it wasn't, in fairness. Battered plastic titan hulls, endless dwarf heads from the Fantasy Regiment box set, over a hundred Womble Marine ammo packs. Tat and crap. But there, glistening like gems amongst the dross, were a handful of classic lead pieces that got my blood all fired up.

The Barbarian Javelineer was the first of them. Four of these Marauder Goblins were the next.


They were a blister pack of twelve, once upon a time. Not sure where the rest went, but I still had two in my box of painted lead (shown above. I did mean to take 'before' shots of the others, but this blog airs before the watershed). Once their old aquaintances got underway, with a fresh coat over their original affair, (the hornblower and the boss joined in for a fresh-up. As did the four Reaper Goblins who were nearby at the time.

Before
After
Nothing extravagant, just redoing the skin and armour with brighter highlights, really. 

Here are the ones from the bag - two archers and two swordmen.
Red trim on the leather was as fancy as I was feeling, so no shield designs for these two. They're just plain goblins, after all.

Tiny models, but all bristling with character. They needed some fixing - missing falchions replaced by chaos warrior or Heroquest weaponry, new shields, etc - but they make a nice little raiding group. Maybe even a Frostgrave Warband, if I really want to claim unfair cover bonus for very small models.

They'll never see us coming! All we need now is a wizard...

So far, so surprising. I didn't see the Marauder Goblins coming, even if you did. But in keeping with the theme of 'back from the dead', could you possibly have expected...

Windswept and interesting? Oh my!

Yes! Another classic 80s model, a Wardancer! So old, he still had one of their moulded on shield bosses (on his leg, of all places). I clipped that off and redid the paint, and here he is, red and green and celtic.

Also back from the dead - a Necron Warrior.


The freebie handout from White Dwarf, if I remember right, from when they introduced the race in the first place. This when they were a race of murderous Terminator-style robots with little backstory, rather than the Tomb Kings in Space that they are now. Iirc, back then you never removed Necrons as casualties until the entire army was beaten. There was always a chance that a downed model would get back up. Very slow, rather dull as an army (just Warriors and Lords on offer to start with), but quite fun for a themed match. I think I preferred the original fluff somehow, although the newer models are much better. This guy has appalling posture - that jutting head is terrible. Stand up straight, man!

And finally, in a vague nod to the forthcoming Kharadron Overlords, the most treasured chunk from this mini haul. Ladies and Gents, the race that will not die - the Squats!

Cry Vengeance! For Karag Neckbeard!

A friend of mine had a squat army, way back when. All bikers and trikers, backed up by Squat Terminators (Hearthguard, was it?) and psychic Living Ancestors. I know that the race is now a verb, that 'to squat' something is to remove it totally from fluff and game and deny it will ever come back. But it's a shame.

His beard looks like it could be fake, thanks to that heavy black shading. Oops.

Three reasons:


  1. Viking-style space dwarves with burrowing tech would make for cool miniatures. Update them a bit, sure, but GW are good at doing that.
  2. Financially, if Harlequins and Genestealer Cults sold well, Squats would similarly appeal to the wallets of our generation of gamers.
  3. I think there's room in 40K for an all-vehicle army, or nearly all-vehicle. If all squats could field were strange and interesting artillery (grav-cannons, mole mortars, etc) and fleets of light bikes, they'd be bringing something to the field that I don't think any other army does. Lots of other armies can, of course (Eldar and Space Marines both often do bike swarms, I think), but there's other options for them too. Stick in some of the Epic scale Land Trains, and you'd easily have a range that would appeal to the fans and the tacticians. 


Now, there's still a single lead model left to fix and paint from this trove, but it was that much more battered it will take a bit longer to do over. So stay tuned!

Gone, but not forgotten

Gorechosen: Anger Management

$
0
0
It's been a few months since I rushed through sufficient basecoats to play Gorechosen with my family at Christmas (and got my anvil handed to me), but I've finally finished off the Red Hand Gang.

Gorechosen
Imagine this walk in slow-motion and it would be AWESOME.

Let's meet the Fab Four!


Vexnar the Reaper, Aspiring DeathbringerVexnar the Reaper, Aspiring Deathbringer

We'll start with Vexnar the Reaper, Aspiring Deathbringer and probably the most 'standard' template for a Khorne champion. In addition to his fabulous icon headpiece, he comes with a very cool skull faceplate and quite a cocky stride - almost looks like he's about to fall over, but he manages to swagger it off.

I will say, having never painted Chaos warriors before, it was a lot of fun slapping on the red and brass armour. I could happily knock our a small army of these guys.
  • Armour: Khorne Red base, Nuln Oil wash, Khorne Red layers
  • Brass trim: Retributor Armour base, Reikland Flesh wash, Golden Griffin drybrush, Agrax Earthshade wash
  • Icon: Retributor Armour base, Carroburg Crimson wash
  • Skin: Kislev Flesh base, Reikland Flesh wash, Flayed One Flesh drybrush
  • Mail & Weapons: Chaos Black undercoat, Ironbreaker drybrush, Runelord Brass details
  • Weapon hafts: Morunfang Brown base, Agrax Earthshade wash
  • Belts and Straps: XV-88 base, Agrax Earthshade wash
  • Boots: Charcoal Grey base, Nuln Oil wash

Heldrax Goretouched, SlaughterpriestHeldrax Goretouched, Slaughterpriest

To accommodate all the pastoral needs of the Bloodbound: Heldrax Goretouched, Slaughterpriest. This is the alternate version of the Slaughterpriest (the one that didn't come free with White Dwarf), but he seems ubiquitous nonetheless (I've somehow ended up with two copies).

He's a giant, even among Khorne Champions (in the fluff, Slaughtepriests grow larger and get bony protrusions), and I quite like the design. The bald head just screams insanity in a very Ade Edmundson way (maybe I should sculpt a trilby, NHS glasses and a frying pan on the spare model).

Of all the paint jobs, I don't think I've done this one justice. The 'pallid skin' look is still eluding me, but at least he stands out:
  • Skin: Rakarth Flesh base, Nuln Oil wash, Pallid Wych Flesh drybrush, Reikland Flesh glaze, Pallid Wych Flesh layers

Redarg Bloodfane, Exalted DeathbringerRedarg Bloodfane, Exalted Deathbringer

This bullish chap is Redarg Bloodfane, Exalted Deathbringer, and first among the Gorechosen. Of all models, I liked him the least (the bare chest and horns seemed too beastman-ish), but he's grown on me during the painting and boy has he grown on me during his initial battle (that skullgouger is already a legend in its own right).

His flesh tone was also a departure from the standard pink - a wash of Carroburg Crimson gave him a deep enough shade for his awesome scar tissue (front and back) to pop out.

Kore Hammerskull, SkullgrinderKore Hammerskull, Skullgrinder

Last, and by means least, Kore Hammerskull, Skullgrinder. My favourite model of the set: it doesn't get more Age of Sigmar than a skull-faced blood-worshipping crazy. Swinging a flail! Made from an anvil! On fire!

Same general paint recipe as the rest of the guys. I picked out his helmet with Stormhost Silver, and put the flames in the gradations of Skull White > Averland Sunset > Slayer Orange, washed with Cassandora Yellow and with a touch of Nuln Oil at the tip.

And there we go: four character models at a knock-down price and a quirky little combat game to accompany it. At WoffBoot XI, I'll be slapping folk with gauntlets, whether they want it or not.

KHORNE!

Warlord of Galahir: Bouncers Back

$
0
0
We got puréed in our last encounter with The Bouncers, but if first you don't succeed ... blame the questbook and generate some more effective dungeoneers!


Behold, two new-and-improved heroes, ready to re-try the mission!

All New! All Different!

After persisting for four missions, Leofa finally had enough of the limited options offered by Guraf and Kapoka, so Kraken generated a couple of dopplegangers with some more interesting powers.

I (Kraken) quite like the character generation system in some ways, although as ever Mantic are guilty of some erratic work. Spell selection from the enormous spell deck is a fun system, but highlighted that there are many duplicate spells around, as well as spells almost identical to each other but for one glaring weakness. E.g. Energise, below, is nearly identical to another spell that does exactly the same thing except that people only get their wounds back on a 4+. Why would you ever pick one and not the other? Daft.

Guraf II: Level 3 Dwarf Cleric

  • Move: 7
  • Combat Dice: 3
  • Armour: 2
  • Health: 3 hearts before injured
Holy, Stalwart (2), Spell Caster - Divinity: Energise (major, everyone within short range gets a wound back), Power of Faith (major, everyone in range ignores the first wound from all attacks for the rest of the turn), Transfusion (minor, next time the target suffers a wound, the caster takes it instead) and Holy Might (minor, +2 dice to the caster's next attack.

Actually, somehow these got a bit turned round by the evening. Not by design, but by an accidental reshuffle of the spell pile, Power of Faith got swapped for a different spell that grants the target Frenzy (3) on their next attack. Might swap that back for next time, Power of Faith is a better spell I think.

Kapoka II: Gladewalker Wizard

  • Move: 6
  • Combat Dice: 2
  • Armour: 1
  • Health: 2 hearts before injured
Take Root (a feat that stops you moving or being moved but gives you +3 armour until the end of the turn), Magister (a feat that casts three petty spells at once), Stealth (can't be shot at from more than short range, although spells can still get you), Spellcaster - Petty and Sorcery, Earth: Hold Fast (another renamed Feet of Stone, but a minor one), Vile Visage (minor, lets you spin an enemy model and choose its new facing), Torment (major, a ranged attack of one dice per armour of the target) and Blink (minor, put yourself somewhere else on the same tile).


Mission 4: Bouncers, Attempt II


We kick off, as we had previously, facing a pair of Trolls in the main chamber. We also set up the corridor behind the locked doors, as we're now under no illusions as to what lies beyond.

The mission is the same: kill both Trolls and open the final door to complete the mission.

My mission is also the same - take one of them down before this happens. Or at least delay them until I can bring in unlimited green minions.


Shazam! The newly-improved Gladewalker wastes no time in playing his feat (three Minor spells at once) and Blink teleports within range of the first Troll. He then casts Vile Visage to flip the Troll around (I hope you like it that way, darling) and immobilises him with Take Root.

This Troll is dressed like a Turkey and ready to be stuffed!


The three combat heroes pile in, with bonuses for rear-attacks, outnumbering and an immobilised enemy. The Elf doesn't manage to scratch him, though the Dwarf takes off a wound (despite his denuded combat status).

And then the Salamander comes in. He does two wounds right away and a further two with his Relentless ability.

No regeneration saves are made and one Troll is down! On the first turn! Easy peasy!

This is why all of us repeatedly say 'backs to the wall' after every single move we make. You leave a blind side, you get blindsided. 


The Overlord decides to back his remaining Troll into a corner, and then it's the adventurers' turn again.

In which they'll no doubt turn me round again. Cry yourself to sleep in the corner, trolly, it's your only hope.

Flushed with early success, we decide that the obvious course of action is to divide our party and send our only fighter on a solo mission.

I love how quickly a mild success can get to your heads. The evening started with a very strict decision to stick together at all costs and not split the party, as that way certain death lay. Ha! Three turns in, and you're drunk on power and glory already. Your confidence is your weakness, as my faith in my Trolls is mine.

The Elf kicks down the door and the Salamander charges down the back corridor to slay the Orcling obstacles and open up the final door.

While this is going on, the remaining three adventurers will wear down the final Troll with magic and missiles until we can reunite and win the level! What could go wrong?

Nothing. Of course.

For a start, the Salamander whiffs his attacks against the first mass of Orclings (his blade must be slippery with all that Troll blood) and the Overlord brings up a second mob of Orclings. So our hero is now outnumbered, and while he's in no physical danger, he's going to have a harder time hacking through the critters.


In the main chamber, the Troll advances towards the heroes, but finds himself turned around with Vile Visage, immobilised with Take Root, and has a wound knocked off by the Dwarf Cleric.

(we're starting to wonder if this all-improved Gladewalker isn't a bit too all-improved - he's knocking spots off his former incarnation)

(I wondered that too, but remembered that he's still made of tissue paper)


After much flailing about, the Salamander chops up onegroup of Orclings. At last - progress!


... and then the Orverlord plays a card that brings back a fresh pack of Orclings, right where we don't want them. Damnit!

Binary fission, Orcling-style. Aw yeah. 


And by now, our very limited time has expired. The alarm bells ring and the green tide starts to appear, starting with an Orc Greatax.

Gee, it might be useful to have a combat hero at hand. I wonder what became of him?


Although no warrior is needed against the second Troll. Fortified by a battle potion and holy righteousness, the Dwarf manages to clobber the Troll. Our second target is down, and all we need to do is get to that last door to complete the level!

I mean, how hard could that be?


Well, a lot harder than it looks. Despite using his combat feat, the Salamander is making no headway against the Orclings. I can't even blame the dice - poor Hrrath was rolling above-average attacks, it's just that the pesky Overlord was beating them with boxcars at every turn.

I don't know how many turns this went on for, but it felt like a lot.

It was all the turns. All of them.


Back in the main chamber, kicking down a simple door proves elusively stubborn, and our three ranged heroes are starting to take hits from the greenskins as they try to break into the corridor via the other route.

Improved though they may be, they aren't actually all that hard hitting. The Cleric can pack a respectable punch, but to do anything hefty, needs to take a turn charging up. The Gladewalker is excellent in support, with his twisty-turny spell, which we all decided was called Flip rather than it's longer real name, and the Elf is perfectly respectable at shooting things from a distance, but only mediocre against doors. Heh.


Even when the Gladewalker tries to help out the Salamander with a Take Root spell, we're still getting nowhere.

In the meantime, things are getting hairy for the rest of the party, particularly for the Dwarf (who's hairy enough), who has been absorbing wounds from his teammates, as well as taking them from the encroaching greenskins, and is looking very shaky on his feet.

Oh Healer, heal thyself!

It would be nice to get him down into the corridor, where the Orcs couldn't gang up on him, but that damn door is proving elusive and we all seem to be trapped.

Did I say this was easy peasy?


Finally we're getting somewhere! The corridor door is broken down and the Dwarf races through it. However, he fails to batter down the critical final door, and now the Elf is looking a bit wobbly on her last few wounds. And the green tide keeps coming...

The Orclings, it need hardly be said, remain intact. The Salamander is considering knitting as an alternate career.


I got one!

The Dwarf once again fails to break down the door, the Elf is cowering in a corner, another Orc Skulk has appeared and now they greenskins are advancing down the corridor, but I killed on set of Orclings.

In brighter news, we've been at this so long, the Overlord is running out of command cards to throw at us, so the pace is slowing down - which is a good thing, because we're so vulnerable, we're counting down the turns in how many wounds we can absorb per round.

Without my extra activations, I'm stuck on only one a turn. That's definitely going to give them an advantage, although right now they badly need it!

Also: I got one!

Yes, you did very well. *pat pat


And then I get the other one! Take that Orclings!

They go to their tiny hovel in the sky, having more than done their job several times over. 

The final door stubbornly resists the Dwarf's efforts. I wonder if they'd be more agreeable if I painted them?


The Elf and Gladewalker decide their best option is now to huddle in a corner and hope the Dwarf Cleric's healing rays can keep them on their feet.


And still the green tide surges on...

...surges feels a bit strong, at one activation a round. Laps?


Buoyant after his mighty triumph, Hrrath Orclingbane pushes his way past the Dwarf and kicks down the final door. We're out!

Back at the tavern

It's been a mixed bag of missions in this campaign, but that may have been the most fun we've has with Dungeon Saga yet!

It was an excellent night, mostly packed with mirth as the Orclings mocked the Salamander.

After the ease of dealing with the Trolls, I don't know if we deliberately made it harder for ourselves with such an ambitious (re: idiotic) plan, but it certainly made it a nail-biter. I know it's Dungeonering 101 that you never split your party, but I hold that it was a good plan- who could have foreseen that the Orclings would hold the pass like itty-bitty Spartans?

Perhaps each base did hold one hundred of the titchy creatures, for a total of three hundred.


As I mentioned before, the ridiculously short time of this level seems designed to show off the 'green tide' special rules, and it certainly did that. There's just no way to realistically get on top of the oncoming goblins, and your only option is to escape, which is nicely characterful.

I certainly felt the lack of a second combat hero in the group, but the new Gladewalker and Cleric seem to have some very useful skills, so maybe it will force us to be more creative in our approach.

Next time: anything but Orclings!

We'll see about that. Heh heh heh.

For housekeeping, the Salamander managed to generate a lot of kills, due to his hard-won prowess as Orcling-slayer, and poor Kapoka remains unable to land a killing blow. Our pool of points and potions are as follows:
  • Kapoka (Gladewalker): 2 kills + 0 exp
  • Hrrath (Salamander): 2 kills + 2 exp + 1 Haste Potion
  • Thessilar (Elf): 1 kill + 2 exp
  • Guraf (Dwarf): 4 kills + 2 exp + 1 Healing Potion

Final Level

$
0
0
Well, that didn't take long.

Something like 16 months from delivery to shelf. These guys were still alive when it arrived, and now look at them.


Heraldry from left to right - the 14th Everton Foot, Teutonic Knights Templar and the Order of the Verdant Heart.

The final batch of Dungeon Saga is done!

As I'd already done one lot of Undead, I was trying quite hard to find new variations to try for my own lot. So eerie green spooks instead of traditional bedspreads this time...

The spooky glow effect is pretty hit and miss, sadly. In some lights they look like jade statues, in others like seaweed. But they'll do.
Everyone knows elves go blue when turned to the undead.

...and I reckoned I'd do Dwarven Wraiths instead of Revenants. A middle ground between the Return of the King's Army of the Dead (which has an excellent GW plastic kit, by the way) and Pirates of the Caribbean's scurvy crew.

You'd best start believing in Dwarves, missy. You're in one!
No, that doesn't work at all.
They've all got the same shield, as befits their elite bodyguard unit status.
Look closely at this hand, ladies and gentlemen - completely empty! The hammer has vanished into this air!

A final pair of heroes, with the diminutive Halfling Fighter and the stout Dwarven Barkeep.

Morph goes Medieval
I'll have a large one, barman. No offense to your people, of course.

And a table, because Stylus needs taunting.

Taunt taunt.

What with this being Easter weekend, I've even had time for a little Reaper in passing.

Although first I had to do this bugger, after I discovered him lurking in amongst the other Reaper stuff. I balked at doing him the same colours as all the other hybrids, so he got his own  purple and green scheme. Maybe the Cults do an exchange scheme or something.
On Saturday, he ate one dwarven cleric, one human barbarian, one elven wizard and one half-orc druid. That night, he had a stomach ache.
The Reaper stuff occasionally reveals lovely details once you wash it, things that the pale plastic makes it impossible to spot. The Carrion Crawler above, for example, has a slime trail on its base I hadn't noticed before. This Sea Hag's hunchback turned out (splendidly) to be a pet octopus clinging to her shoulder. 
This is Sophie, the Reaper trademark mascot, in one of her many pin-up model incarnations. One of the less sleazy ones, happily, although I've covered up her midriff with a black body stocking. Only because I didn't spot the belly button until too late, rather than prudishness. She's come out a bit bland, the wings need a more orangey pop and maybe some spot colours on the bodywork somewhere, but it's a nice model otherwise.
Finally the Rising Sun kickstarter last month got me feeling inspired. They'd got some amazing paintwork to show off the sculpts, and I felt like doing this Monk in a bright colour scheme. My prudish streak is really out in force this week, I seem to have given him silver nipple guards in the mistaken belief that they were buckles. Hope he likes chafing.

It's a bit sad to see the end of the Dungeon Saga slog, in some ways. I've grown accustomed to their faces over time (their blobby, poorly defined faces). Luckily I still have a ready supply of doors and other furniture - I still need a bookstand for the full set, for one. There's certainly enough to be going on with for now, mind you, and I shall leave you to rest on my laurels with this big group shot.

I like to imagine them doing the big chorus numbers from 42nd Street together.

And now off to the shelf, never to be seen again.

Any Old Iron: Ironjawz vs Disciples of Tzeentch

$
0
0
Bulla, Megaboss of Da Flat Iron Clan and warlord of Da Wasted Plains, gave a hard stare to the stone icon, then headbutted it. He didn't like the way that vulture head was looking at him, so he smashed his forehead into it for a second time. The stone was starting to crumble. Good, he thought. Gork damn him if he was going to take any cheek from a statue.

"Dey are coming for it," said his Warchanter, Groll, tapping out his two stikks while he spoke. They had not reached the ear-bursting beat of battle, but the gods-infused stikks were knocking out an impatient tempo. Every heartbeat brought them closer to slaughter.

"Da humies?" Bulla asked. His outriders had seen a large mob of chaos-worshippers drawing close, dragging a large casket of loot behind them.

Groll nodded at the cracked icon. "Dey want dis one, and the one on the uvver side of town."

Bulla thumped his meaty fist against his breastplate. A shower of rust flaked away, but there were still many inches of pig-iron covering several more inches of thick Orruk muscle. "Get da ladz. We'll pull 'em into our jawz, den crush 'em."

The Warchanter gave both Gorkskikk and Morkstikk a determined bash, igniting the green Waaagh! power within. "It's gonna be an 'ard day's night."


Age of Sigmar battle report: 'Take And Hold' between Orruk Ironjawz and Disciples of Tzeentch.

Melt down the ferrite!
It's All-Skype Fight Night!


The Ark of Alternatives campaign continues apace (that pace being once a month). This time, I Stylus, will be bringing a new faction to play, hastily painted up during the bank holiday: the Ironjawz!

We're using the Take and Hold battleplan from the General's Handbook. It requires you to control an objective (5+ friendly models around it), while seizing the objective on the enemy side. If you have both objectives by Turn 3, you win. If they are still unclaimed by the end of Turn 5, you count the points of destroyed units for a minor victory.

Forces

Da Flat Iron Bullies - Orruk Ironjawz

Age of Sigmar battle report: 'Take And Hold' between Orruk Ironjawz and Disciples of Tzeentch.
  • Ferrous Bulla, Orruk Megaboss, General, Bellowing Tyrant, Battle Brew
  • Groll, Warchanter
  • 5 x Brutes, Big Boss with Boss Choppa, Jagged Gore-hacka, Gore-choppa
  • 5 x Brutes, Brute Boss with Boss Klaw and Brute Smasha, Brute Choppas, Gore-choppa
  • 3 x Gore Gruntas, Pig-iron Choppa
  • 10 x Ardboys, Boss, Orruck Banner, Waaagh! Drummer, 5 x Pair of Choppas, 2 x Choppa/Shield, 3 x Big Choppas
  • [Battalion: Ironfist]
A sneak preview of the latest army I've been working on: the Ironjawz! I've only blogged about half of them, but rest assured, the remainder are tournament-legal, needing only a fiddling amount of chequerboard patterns to be finished.

The army choice was dictated by what I had, and with a mere 25 figures for 1,000pts, this army is certainly economical in both cost and painting time. Two units of Brutes, with a variety of weapon choices, to act as the fists of the army, supported by the combat monster that is the Megaboss. A unit of Gore-Gruntas for a bit of flanking action (either grabbing the enemy objective, or reinforcing my own), and a mob of Ardboyz, who should make very solid objective guards.

I would have liked to include a Wierdnob Shaman, but he just wasn't painted in time, so we went with the Warchanter (to hang around at the back and buff the ladz), and the 'Ironfist' battalion. Between that and my Destruction trait, the units should be able to speed across the battlefield (adding 2D6" to their paltry 4" move) and put some early pressure on the enemy objective.

The Choir of Change - Disciples of Tzeentch

Age of Sigmar battle report: 'Take And Hold' between Orruk Ironjawz and Disciples of Tzeentch.
  • Enchantron Glazaar, Lord of Chaos, Cunning Deceiver, Favour of the Gods, Mark of Tzeentch 
  • Flickerdeath Doublejabber, Herald of Tzeentch, Staff of Change
  • 5 x Chaos Chosen, Mark of Tzeentch
  • 10 x Chaos Warriors, Hand Weapon & Shield, Mark of Tzeentch
  • 1 x Chaos Warshrine, Mark of Tzeentch
  • 40 x Chaos Mauraders, tribal Banner, Flails and Shields, Mark of Tzeentch

Kraken here, and surprise surprise, I'm leading the forces of Chaos into battle. Actually, although this started with the intention of being a narrative campaign, we've actually been switching back and forth between command of the protagonists, the Tzeentchians with their Ark. Luckily this still gives our heroes a chance of winning the campaign, as my track record of victories has been extremely slight. None so far, in fact, which might make the outcome rather predictable. 

This army list was inspired by a comment on a website somewhere else, that mentioned how viable large hordes of rubbish troops can be in AoS. Well, there's nothing more rubbish than a big heap of Marauders! So I took forty of them, backed them up with the mobile shield generator that is the Warshrine, took some Warriors and Chosen as linebackers and quarterbacks respectively, and the relatively standard Lord and Wizard leader combo. 

The Marauders can hit reasonably hard, especially if their numbers bonus triggers. This is more likely with their numbers, and with a bit of extra shielding from either the wizard, the warshrine or the Lord (who can all improve their saves or grant rerolls), they should be quite a nasty tarpit unit. So should the Lord, who comes back as a Spawn if he dies! 

Having marked them all with Tzeentch for Fluff reasons, Stylus pointed out as the battle began that I could then use the Destiny Dice ability. I wish I'd thought of that, then I'd have looked like a keen-eyed ruleshound rather than a lucky chancer. Still, that's Tzeentch for you. 

Terrain and Deployment

Age of Sigmar battle report: 'Take And Hold' between Orruk Ironjawz and Disciples of Tzeentch.

Reading the rules of the 'Take and Hold' battleplan, I'm immediately aware of a weakness in the Ironjawz: I have no cheap, expendable troops to hold my objective. If I want to go for the big win (and of course I do), I'm going to have to sacrifice one of my combat unit to sit at the back.

I choose the Ardboyz, and decide to go straight up the centre with my two Brute units, supported by the two characters. The Gore-Gruntas go on the right flank, able to encircle or add their numbers to the melee.

I'm not really afraid of anything the chaos army has in close-combat, although a wizard that can spit out mortal wounds is concerning, as I have no counter to that (other than bashing him over the head). The plan is to get in quick, and get stuck in!

Age of Sigmar battle report: 'Take And Hold' between Orruk Ironjawz and Disciples of Tzeentch.

I have a simple plan (I'm a simple man). My army is fairly slow, so I'm going to need to weather the incoming storm as best I can. The Chosen are going up front to try and blunt the advance of whatever orky menace smashes into me first, as well as maybe try and trigger their bonus for letting first blood. The heroes guard the flanks, the Marauders will pour over and through whatever they can with the Warshrine protecting them, and the Chaos Warriors stay at the back to hold my objective. 

Age of Sigmar battle report: 'Take And Hold' between Orruk Ironjawz and Disciples of Tzeentch.

Either I break through to the other side and hope the rearguard can hold out for a win, or (more likely) I can fight off the ork attackers with enough troops left for a lesser triumph. 

Age of Sigmar battle report: 'Take And Hold' between Orruk Ironjawz and Disciples of Tzeentch.


Age of Sigmar battle report: 'Take And Hold' between Orruk Ironjawz and Disciples of Tzeentch.

Disciples of Tzeentch - Turn 1

Age of Sigmar battle report: 'Take And Hold' between Orruk Ironjawz and Disciples of Tzeentch.

They sang as they marched forward. Soaring hymns to the splendour of Tzeentch, weird half-rhymes that jarred on the ear as much as they delighted with their feverish rhythm. Atop the Warshrine-Organ, the Keeper played complex melodies that conjured spurts of devilish fire from the outward facing pipes. The ground reverberated to the beat of their heels. 

Fifty strong, they were. The Warriors droned in bass support from the rear, with the Marauder cultists singing calls and responses in two sections. Once their song echoed between the two Resonance Idols, the interference pattern would unlock the final tumblers of the Ark of Alternatives, and then the last rituals could begin. 

Ahead, the Chosen Castrati shrilled eerily high warning notes. The enemy was ahead, the primitive tribes who infested these ruins. "Allegro!" Glazaar called, and the warchoir gave a single, dissonant "Ha!" as they obeyed. 

Doublejabber, the daemonic herald that accompanied them, warbled weirdly, and a shimmering shield of power began to manifest over the Castrati. Glazaar sang an atonal Tenor aria to support them, and felt joy surge through him as they answered in whistling antiphones. Even if the Orruk assault broke their bodies, their morale wouldn't fail them, not in the middle of such a glorious concert.

Age of Sigmar battle report: 'Take And Hold' between Orruk Ironjawz and Disciples of Tzeentch.

Ironjawz - Turn 1

Age of Sigmar battle report: 'Take And Hold' between Orruk Ironjawz and Disciples of Tzeentch.

"Get movin', yer lazy gits!" Bulla shouted at his lads, pushing the two mobs of Brutes directly forward, while the Gore-Gruntas trotted along by their flank.

"Except you!" Bulla spun around and pointed at the Ardboyz with his boss choppa. "You stay put, yer restless gitz!"

The Ironjawz closed around the mass of humies like a fist. Drummed on by the Warchanter, they would fall upon them from three sides, crushing them.

"Dey iz gathered in da middle of da town," Groll reported. "Da big sqaure wiv all da little round stones."

"Cobbles," Bulla corrected him.

"Nah, really boss, dey are."

Age of Sigmar battle report: 'Take And Hold' between Orruk Ironjawz and Disciples of Tzeentch.

Ironjawz - Turn 2

Age of Sigmar battle report: 'Take And Hold' between Orruk Ironjawz and Disciples of Tzeentch.

"Waaagh!" Momentum was with the Ironjawz, and Bulla wasn't about to let the humies react to their sudden onslaught. He drove his greenskins forward until they were within spitting distance of the enemy, and then charged.

Rusty iron met ensorcelled steel, and the Brutes closest to him hacked down three of the leading chaos chosen, who could only answer with a flesh wound against Bulla himself.

On the right flank, the Chaos Lord struck first, unleashing the daemon in his weapon and calling upon the Great Architect to favour his odds. Two of the charging Gore-Gruntas were immediately slain by the attack, with the sole survivor too shocked to trample back.

Age of Sigmar battle report: 'Take And Hold' between Orruk Ironjawz and Disciples of Tzeentch.

On the left flank, the Orruks enjoyed better favour, surrounding the Herald of Tzeentch and pummelling him to gristle.

The Ironjaw attack had struck hard, although Bulla could now count an awful lot of humies massing to counterattack. This was going to be fun. "I can see paradise by da warshrine light."

Age of Sigmar battle report: 'Take And Hold' between Orruk Ironjawz and Disciples of Tzeentch.

Disciples of Tzeentch - Turn 2

Age of Sigmar battle report: 'Take And Hold' between Orruk Ironjawz and Disciples of Tzeentch.

They sang as they marched, before. Now, they sang as they fought. 

Age of Sigmar battle report: 'Take And Hold' between Orruk Ironjawz and Disciples of Tzeentch.

A terrible refrain that almost drowned out the vulgar chanting and pounding of the Orruks. As the choir exploded outward from the Warshrine, they beat a dolorous madrigal with their spiked flails. Individually, they were no match for an Orruk. Indeed, the huge Brutes smashed several choristers aside effortlessly. 

Age of Sigmar battle report: 'Take And Hold' between Orruk Ironjawz and Disciples of Tzeentch.

But together? Together, they were implacable. Glazaar strode nonchalently away from the corpses of the Orruk cavalry, yodelling an improvised tarantella gleefully. His choir sang and fought as one, the Warriors rushing in to support the right flank and hacking an Orruk apart. Many of them died, of course, but it never stopped the music. Even the towering monster that led the Orruks seemed off key, dropping his guard long enough for the last Castrati standing to slam him with his axe.

Age of Sigmar battle report: 'Take And Hold' between Orruk Ironjawz and Disciples of Tzeentch.

Only the Warshrine failed to add to the ensemble. The Keeper was building slowly up to some magnificent crescendo. Or at least Glazaar hoped he was, it was mostly just twiddles and noise at this stage. 

"Sing!" he sang. "Sing while you're winning!"

Age of Sigmar battle report: 'Take And Hold' between Orruk Ironjawz and Disciples of Tzeentch.

Ironjaws - Turn 3

Age of Sigmar battle report: 'Take And Hold' between Orruk Ironjawz and Disciples of Tzeentch.

"Done, done, on to da next one!" Bulla shouted in frustration, "Gorks tusks - 'ow many more of dem are there?" He felled the last chosen with a well-time headbutt, then lashed back and forth with his Rip-Tooth Fist, sending broken bodies flying in all directions.

No matter how many of these humies were killed, there were always more of them, and they never seemed to take fright, as their breed usually did. And their numbers were taking a toll on his Brutes. Some had even run away, the cowardly gits. Some had even been dragged under, which was even more cowardly.

Only a couple of Brutes remained, swinging gamely as the fur-clad and steel-clad warriors respectively. It was at that moment Groll chose to enter the fray, smashing his Gorkstikk ineffectively into the marauders.

"You idiot!" Bulla bellowed. "Oo's goin' ter fetch da Ardboyz now?"

Even as he fended off blows from the furious humies, Bulla could see his reserve forces, still waiting at the far end of the town, picking their tusks and generally not getting involved. If he got out of this, he resolved, there would be some heads that wanted knocking together.

Age of Sigmar battle report: 'Take And Hold' between Orruk Ironjawz and Disciples of Tzeentch.

Disciples of Tzeentch - Turn 3

Age of Sigmar battle report: 'Take And Hold' between Orruk Ironjawz and Disciples of Tzeentch.

"O great Tzeentch!" Glazaar sang. "Thank you for the music! This song we're singing!"

"Thanks for all the blood we're spilling!" the choir picked up, changing to the more upbeat tempo without missing a beating. Two more Orruks fell, then another. A third ran from the field, clutching his ears.

"Who could live without it, we ask in all honesty?" rumbled the basses.

"Probably me," sputtered the writhing corpse of Doublejabber, underfoot.

Thunderous organ music swelled up from the Warshrine, and the robed figures bearing it hefted it towards the nearest Orruks. A few spouts of flame puttered forth, but nothing climactic. Glazaar could see the Keeper desperately pulling stops and trampling pedals.

Glazaar could see the Megaboss now, through the gap that the monster had hacked in the choir. Only ten or so of them stood now, but they wouldn't stop until the music had to.

"Without a sword or a blade, what are we?" Glazaar asked his foe, and prepared to charge.


Age of Sigmar battle report: 'Take And Hold' between Orruk Ironjawz and Disciples of Tzeentch.

Ironjaws - Turn 4

Age of Sigmar battle report: 'Take And Hold' between Orruk Ironjawz and Disciples of Tzeentch.

The last Brute disappeared under a storm of chaos swords, his great choppa left buried in the chestplate of his last adversary.

Age of Sigmar battle report: 'Take And Hold' between Orruk Ironjawz and Disciples of Tzeentch.

Bulla stamped down on yet more humies. He was getting bored of such easy pickings and, if he was going back to the Gorkamorka, he wanted to end on a proper fight.

"Oi you!" he shouted at the boss humie who had single-handedly killed his Gore-Gruntas. "Take on me!"

Age of Sigmar battle report: 'Take And Hold' between Orruk Ironjawz and Disciples of Tzeentch.


Disciples of Tzeentch - Turn 4

Age of Sigmar battle report: 'Take And Hold' between Orruk Ironjawz and Disciples of Tzeentch.

"So I say thank you for this Warboss, for giving him to me!" soloed Glazaar as he closed the gap to the Orruk leader. 

Clad in iron plates of terrible thickness, Glazaar feared for a moment that he wouldn't be able to hurt his foe. But as he got close, he realised his fear was foolish - the Megaboss was already badly hurt. His armour was cracked from half a dozen flail blows, and there was a sharpened tuning warfork impaled in his thigh. 

Glazaar hammered on the titan's armour like a steel drum, hitting it in a perfect storm of tympanic battery. Ominous vibrations shuddered through the Megaboss's frame, and it staggered backwards, clutching its chest and moaning. 

The organ solo finally let rip. 

The wave of sound ripped the Megaboss apart like a tin shed in a typhoon. And the reverberating echoes of its demise didn't die away. Instead, they built up, reforming the music to something newer, something more glorious. Glazaar felt it rising up in him like dawn.

"Ch...ch...chh..." he choked, his song stilling for an instant. "Changes!" 

And he ascended to Daemonhood.

Age of Sigmar battle report: 'Take And Hold' between Orruk Ironjawz and Disciples of Tzeentch.

Disciples of Tzeentch - Turn 5

Age of Sigmar battle report: 'Take And Hold' between Orruk Ironjawz and Disciples of Tzeentch.

"Turn and face the strange!" Glazaar commanded, thrusting his warpike towards the last remaining Orruk, their drumless drummer boy. 

The hapless musician clearly thought about turning his pa-rumpapump-rump to the foe for a second, but his Orruky nature got the better of him. Glazaar shrugged off the blows from the club-like sticks, his new Daemonic frame too powerful to feel them, A quick riff of blows from his axe, and the Orruk was wrong-footed, staggering away. 

Behind him, the choir still sang. They were greatly diminished, a mere handful. But they were enough. The Orruks would more than pay for their deaths when the new world began. 

"These children that you spit on as they try to change these worlds," he told the Orruk, "are immune to your... consultations!"

Age of Sigmar battle report: 'Take And Hold' between Orruk Ironjawz and Disciples of Tzeentch.

Ironjaws - Turn 5


Age of Sigmar battle report: 'Take And Hold' between Orruk Ironjawz and Disciples of Tzeentch.

Groll could hear the iron-shod approach of the Ardboyz behind him. Better late than never, he thought, although maybe Bulla wouldn't have agreed with that.

The Warchanter took a few steps back from the deamonic titan that had erupted from the boss humie. It's not that he was scared, Groll wasn't scared of any humie, but sometimes it was better to change the tempo from brutal to kunnin'.

Age of Sigmar battle report: 'Take And Hold' between Orruk Ironjawz and Disciples of Tzeentch.

The Ardboyz charged into the space he had vacated, chopping away at the deamon prince with the frustration of having missed most of the scrap. After exchanging a couple of good blows, Groll could see it was useless, and beat the retreat.

Let the humies have their trophies. "We gotta get out of dis place!" They were probably rubbish anyway. "If it's da last fing we ever do!"

Age of Sigmar battle report: 'Take And Hold' between Orruk Ironjawz and Disciples of Tzeentch.

"Time may change me! But I can't trace time!" Glazaar sang to the backs of the retreating Ironjaws. 

With a rebel yell, the idols were theirs. The Ark would soon be open, and the last ritual before the Day of Change could begin.

Result - Minor Victory to Disciples of Tzeentch!


Locker Room

Defeated! And it was all going so well. I had seized the initiative and secured the double turn, and yet I managed to stuff that up.

I think my fatal error was not getting in my first attacks against the Chaos Lord - with their charge bonus, I'm pretty sure the Gore-Gruntas could have killed him outright, but I was more concerned about the Chosen's attacks against my own general and wanted to reduce their numbers.

(and kudos for Kraken for using four of his Destiny Dice to ensure his Lord's one-shot ability hit, wounded and did 12 points of damage - that's some pretty lethal synergy between Slaves to Darkness and Tzeentch and it's nice that the old units can benefit just as much from the new rules)

Hoo boy, yeah, that was a good round. I'd been hoping to save it for the Megaboss, but staring into the Gore-Grunta charge, it was definitely a case of use it or lose it. 

In fairness, they probably could have killed, or severely weakened, my Megaboss, but in the big picture, Kraken needed the Inspiring Presence more that I did. The Marauders would have melted away if only they had taken Battleshock tests, but they never had to and remained a strong bulwark to tie me down and chip away wounds.

Yeah. There was one whiffy round, but otherwise the Orruks were easily killing off ten or so Marauders a turn. With a lowly Bravery of 6 (including banner bonus), they wouldn't have been hanging about long.

I might have been able to push on to victory despite that, were it not for my other mistake: not bringing up the Ardboyz sooner, or even right away. In retrospect, I could not afford to leave 20% of my army guarding the objective, so a major victory was really unlikely. I needed to hit the Chaos bunker with overwhelming force, and they could have helped plug the gaps. As it was, deprived of both their Battalion and Allegiance move bonus, it turns out Ironjawz are pretty damn slow.

Although, when they do have both those bonuses, Ironjawz are pretty damn fast. I was almost within charge range in Turn 1, and was certainty set up favourably even if I didn't win the Initiative roll. I'd like to see what they could do in a more fluid battle (this one did degenerate into a giant melee).

My guys pretty much performed as I wanted them too. This in itself is unusual (I had a plan? And it worked?), but not as unusual as seeing Marauders beat back a line of elite killers plus an enemy general. I was lucky that any of them survived the encounter, frankly, but they absolutely did their job. And the Warshrine certainly helped - the second save it gave them all was invaluable. In the end, I only lost it because the Marauder unit was too small to be within range any more.

In terms of the new units: the Warchanter is good for buffs, and while fairly hopeless in combat, is more durable than average. The Megaboss didn't really find his swing until halfway through the battle (although I was forgetting to swing his Battle Brew), but could dispense some good buffs. I did waste his command ability (there were never enough units to guarantee a Waaagh!, and I lost a couple of Brutes through Battleshock, so he should have stuck to Inspiring Presence). It's a shame he was worn down by the Marauders, or he might have given the Chaos Lord a run for his money.

I love this Chaos Lord (strictly speaking a Lord of Chaos). Even if he dies, he lives on as a Spawn. What's not to love about that? His Daemon Weapon thing is a nice touch, although without the certainty of Destiny Dice I wouldn't expect much out of it. Two 1-in-three chances to miss is too many in my book.

I really liked the Brutes. Their ability against high-wound targets makes them great character-killers (especially if that is a lowly wizard) and they are generally as tough and choppy as you'd expect them to be. I wasn't expecting to like the Jagged Gore-hackas (the polearms), but they do allow a concentration of attacks in a narrow area, which is useful with this big bases.

Both the Chosen and the Warshrine didn't really get much of a look in, in the end. The Warshrine's save bubble is great, but it's very hey-ho in combat. It also kept failing to activate its ability. Rerolling all failed armour saves could have been great (especially in combination with the bonus save), but I never saw it happen. And the Chosen are clearly pretty decent in combat, but died too fast to shine, even if the sole survivor took three of the Megaboss's wounds all by himself. 

The Gore-Gruntas didn't get much of a chance to shine, which was my fault, but I think they are better used on the flank, to pick off characters or seize objectives. They don't seem to generate a lot of hitting power to be used on a frontal charge,

Just a Weirdnob Shaman to add now (I'll save the Maw-Crusha for my Christmas list), and it will be useful to have the ability to buff up their already-considerable armour, or throw out some ranged attacks.

And I've definitely got some strong ideas about my Woffboot list after this!
Viewing all 1337 articles
Browse latest View live